Home cooks often face an abundance of fresh produce, especially during peak growing seasons. While a fresh harvest brings joy to the kitchen, managing surplus can be a challenge. One effective and rewarding solution is the practice of preserving fresh chives and other delicate herbs. This method not only prevents waste but also significantly extends the shelf life of herbs, ensuring that their vibrant flavor is available year-round. Maintaining a pantry stocked with homemade dehydrated herbs offers notable budget-friendly advantages, reducing reliance on expensive store-bought versions. This guide provides a comprehensive approach to creating your own supply of dry chives, walking you through selection, preparation, processing, and proper storage. You will learn the best methods for transforming fresh chives into convenient, flavorful flakes ready for any dish.
Selecting and Preparing Your Harvest
The quality of your dehydrated herbs begins with the initial selection. For optimal results, choosing the best stalks is paramount. Look for chive stalks that are firm to the touch and exhibit a bright, uniform green color. Avoid any bunches with yellowing tips or signs of wilting, as these indicate a decline in freshness and will not yield the best dry chives. Starting with two bunches of fresh chives typically yields the perfect amount to fill one standard spice jar, making it a manageable quantity for a first attempt at homemade chive flakes.
Required Tools and Equipment
Having the right tools simplifies the dehydration process. You will need:
- A sharp knife or dedicated kitchen shears for precise chopping.
- A clean, highly absorbent kitchen towel to remove moisture.
- A food dehydrator for the recommended method, or a baking sheet with parchment paper if using the oven.
- Small airtight glass jars for final storage.
Step-by-Step Preparation Guide
Proper preparation is crucial for successful dehydration and creating high-quality homemade chive flakes.
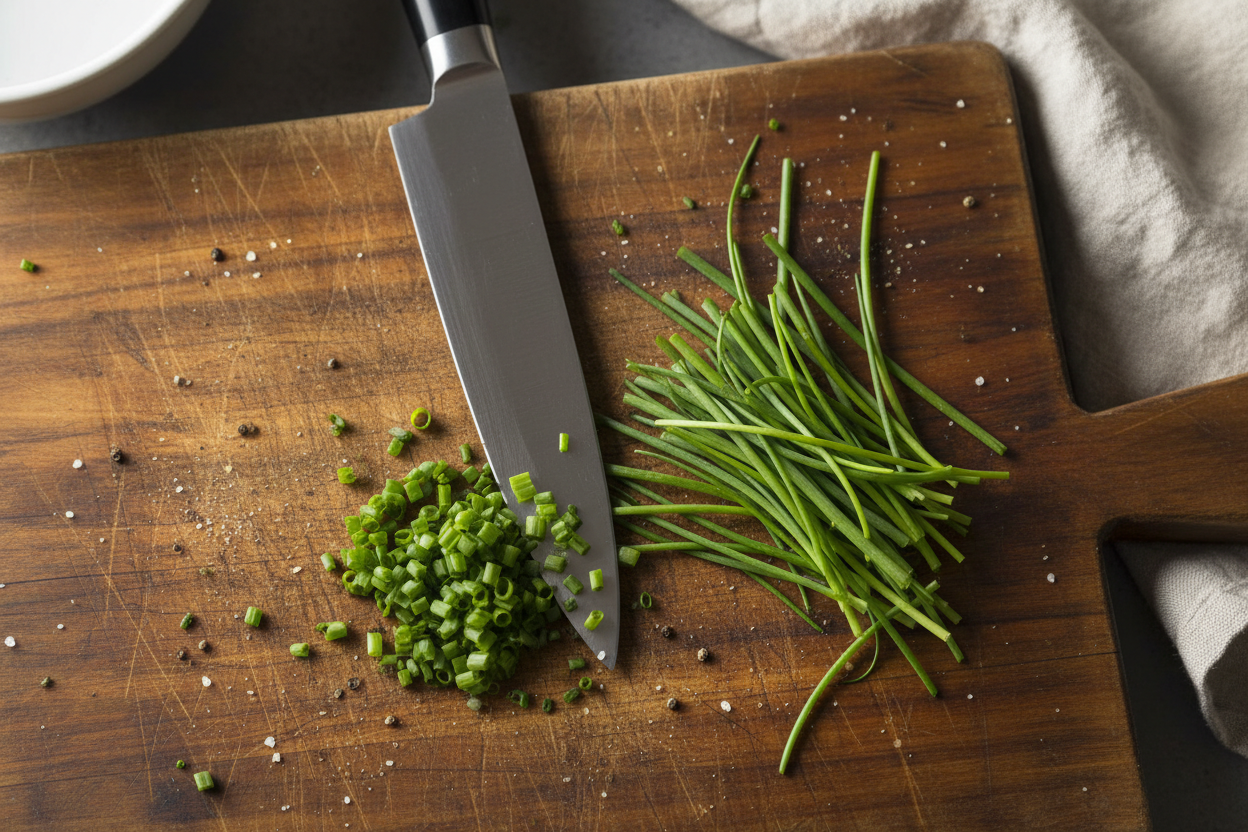
- Washing: Begin by thoroughly washing the two bunches of fresh chives. Hold them under cold running water, gently swishing them to eliminate any garden dirt, debris, or potential insects. This step ensures cleanliness before processing.
- Surface Moisture Removal: After washing, it is critical to remove all surface moisture. Lay the chives flat on a clean, highly absorbent kitchen towel. Gently pat them completely dry. Excess surface water significantly slows down the dehydration process. It can also cause the herbs to steam rather than dry, compromising their texture and flavor.
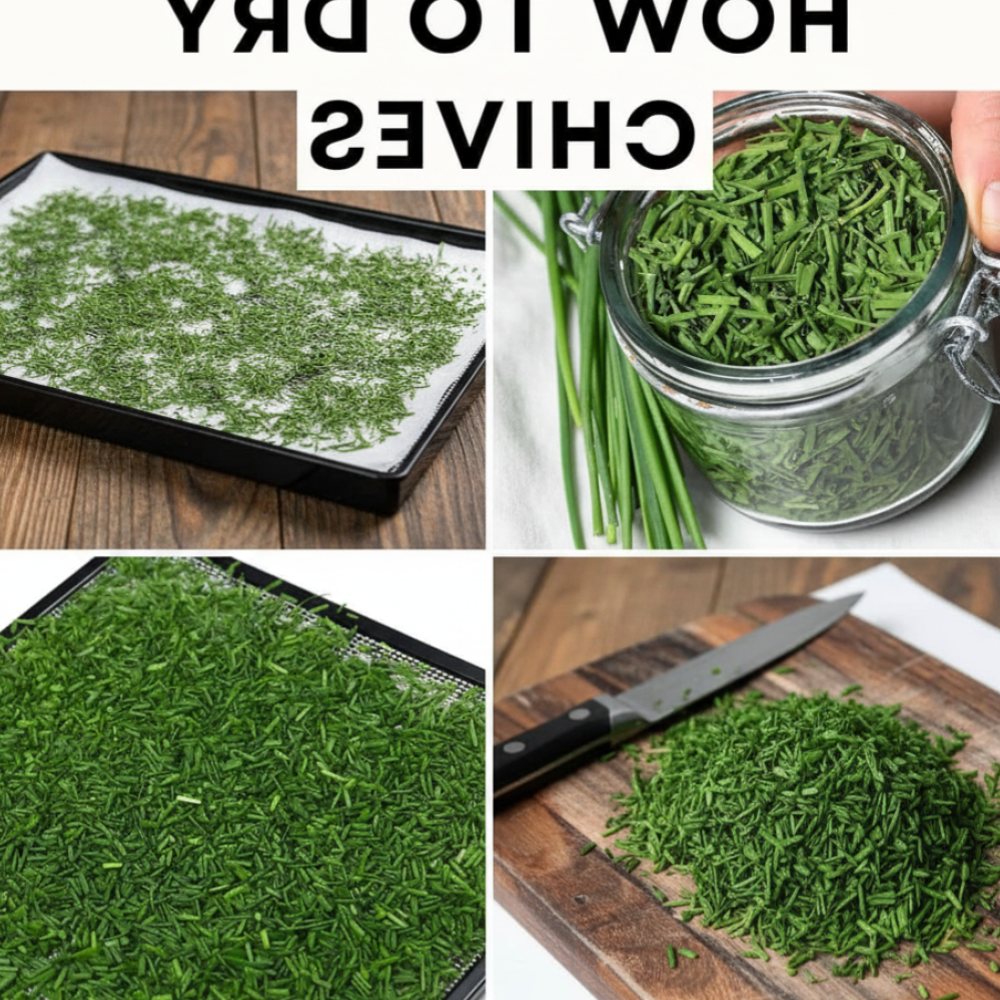
- Uniform Chopping: Once dry, gather the chives and finely chop the stalks. Aim for uniform 1/4-inch pieces. Uniformity is key here; pieces of similar size will process at the exact same rate, ensuring consistent drying. This prevents some pieces from becoming over-dried and brittle while others remain too moist.
Processing Methods
Two primary methods are effective for creating dry chives: using a food dehydrator or a conventional oven. The dehydrator method is generally preferred for its controlled environment and consistent results.
1. The Dehydrator Method (Recommended)
This method provides the most consistent and energy-efficient way to create dehydrated herbs.
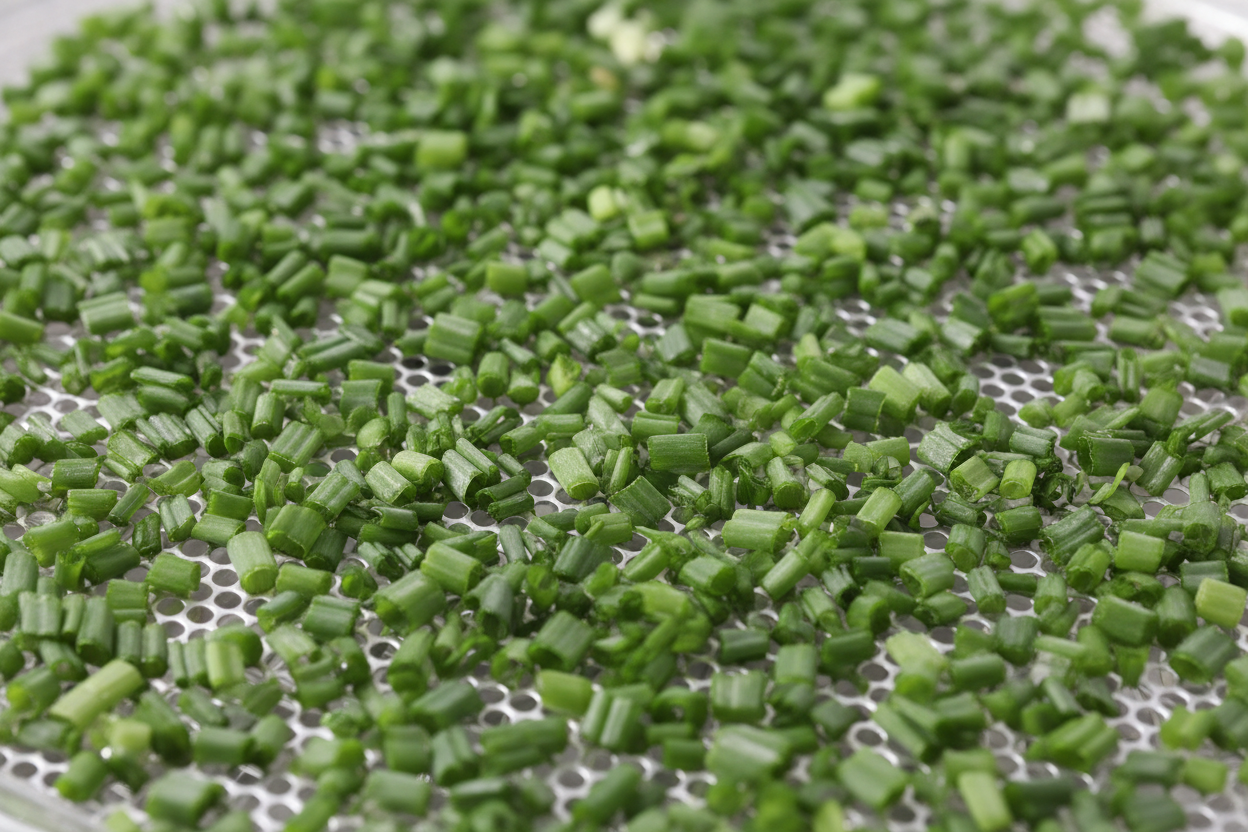
- Arrangement: Spread the 1/4-inch chopped pieces of chives in a single, even layer on a dehydrator tray. Avoid overcrowding, as this impedes proper air circulation and prolongs drying time.
- Temperature Setting: Set your food dehydrator to a low temperature, specifically 95°F (35°C). This gentle heat preserves the delicate flavors and colors of the chives.
- Drying Time: Run the machine for approximately 2 to 3 hours. The exact time may vary based on your dehydrator model and the chives’ moisture content. Check the chives periodically. They are fully dry when they snap easily and feel totally brittle to the touch, indicating all moisture has been removed. This process yields perfect herb dehydrator recipes.
2. The Oven Method
If a food dehydrator is not available, your oven can serve as an alternative for air drying alliums like chives.
- Preparation: Spread the chopped chive pieces on a parchment-lined baking sheet. The parchment prevents sticking and helps with even drying.
- Temperature Setting: Set your oven to its lowest possible temperature, which is typically around 170°F (75°C). Higher temperatures can cook the chives, leading to a loss of flavor and color.
- Ventilation: To allow internal moisture to vent, prop the oven door open slightly, about an inch, using a wooden spoon or heat-safe object. This is crucial for dehydration, as it allows moisture to escape rather than steam the herbs.
- Drying Time: Bake for 1 to 2 hours. Monitor the chives very closely, especially towards the end of the drying time, to prevent burning. They should be brittle and easily crumbled when completely dry.
Proper Storage Guidelines
Correct storage is essential for maintaining the potency and freshness of your dry chives for an extended period.
- Cooling: After processing, allow the brittle chive pieces to cool completely at room temperature. This step is critical. Packing them while still warm creates condensation inside the storage container, which can lead to mold growth and spoilage.
- Packaging: Once cooled, transfer the dry chives into an airtight glass jar. Glass is preferred as it does not absorb or impart flavors. Ensure the jar is completely dry before adding the herbs.
- Shelf Life: Store the sealed jars in a dark cabinet, away from direct sunlight and heat. Both light and heat degrade the flavor and color of dried herbs. When stored correctly, your homemade chive flakes will retain their prime flavor for up to a year, offering a reliable supply of dehydrated herbs. This method for storing dried herbs truly helps extend the shelf life of herbs.
Culinary Applications
Dry chives offer a convenient way to infuse dishes with a mild oniony flavor without the sharp bite of fresh chives. Their versatility makes them a staple in any well-stocked pantry.
- Stirring dry chives into sour cream creates a classic, flavorful topping for baked potatoes, perogies, or chips.
- Whisk them into morning omelets, scrambled eggs, or savory batters for pancakes or waffles to add a delicate herby note.
- They can also be sprinkled over salads, soups, stews, or roasted vegetables just before serving.
When using dry chives in recipes that call for fresh, remember this general ratio guide: use 1 teaspoon of dehydrated herbs for every 1 tablespoon of fresh herbs specified. This accounts for the concentrated flavor of the dried variety.
Successfully preserving fresh chives means you are never without this delightful herb. Making your own homemade chive flakes is a straightforward process that yields a superior product to many store-bought options. By following these steps, you can enjoy the fresh taste of chives long after the growing season ends, making your kitchen more efficient and your meals more flavorful. The effort to create your own supply of dry chives pays dividends in taste and convenience throughout the year.
For more tips on preserving your harvest and creative cooking ideas, be sure to connect with us. Follow our Facebook page for daily inspiration.
Dehydrated Chives
Ingredients
- 2 bunch Fresh chives Firm, bright green stalks
- 1 cup Water For rinsing
- 1 sheet Parchment paper If using oven method
Instructions
- Wash the 2 bunches of fresh chives thoroughly under cold water to remove any dirt.
- Pat them completely dry with a clean kitchen towel to remove all surface moisture.
- Finely chop the stalks into 1/4-inch pieces using a sharp knife.
- Spread the chopped pieces in a single, even layer on a dehydrator tray or a parchment-lined baking sheet.
- If using a dehydrator, set the temperature to 95°F (35°C) and process for 2 to 3 hours until brittle. If using an oven, set it to 170°F (75°C), prop the door open slightly, and bake for 1 to 2 hours.
- Allow the pieces to cool completely before transferring them to an airtight glass jar for storage.
For more daily recipes and tips, follow us on Facebook!
Click here to join our community!