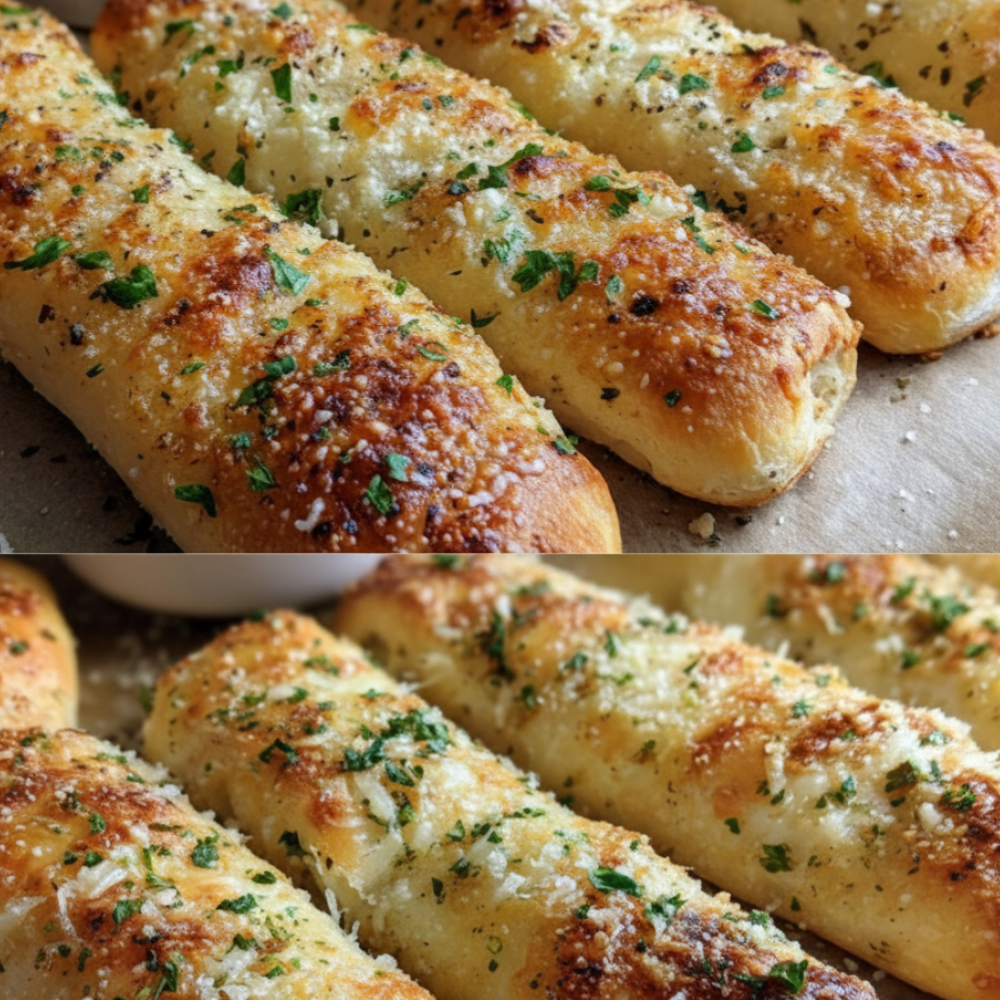
There is an undeniable satisfaction in presenting a homemade creation. Baking your own side dishes at home guarantees unmatched freshness, far superior to anything store-bought. You gain complete control over the ingredients, selecting only the finest components to build flavors and textures. This ensures a wholesome and delicious addition to any meal, particularly when crafting warm, aromatic Homemade Garlic Breadsticks. This beginner-friendly recipe yields incredibly soft results, showcasing the simple pleasure of baking yeast bread from scratch without needing any fancy bakery equipment. It’s an inviting way to add a comforting, from scratch side dish to any dinner table.
The Ultimate Guide to Soft and Buttery Bread Sticks
Why Bake Bread From Scratch?
Choosing to bake bread from scratch offers benefits beyond just flavor. When you make a soft breadsticks recipe at home, you eliminate preservatives and artificial additives often found in commercially produced baked goods. You control the amount of salt and sugar, tailoring it to your preference for a healthier option. The aroma of fresh baking yeast bread filling your kitchen is a comfort in itself, setting a welcoming atmosphere for any meal. This specific recipe is designed to be accessible, proving that even a beginner can achieve professional-tasting results with minimal effort. It transforms basic pantry staples into an impressive and incredibly satisfying accompaniment, making it an ideal from scratch side dish for family dinners or entertaining guests. The reward of pulling warm, golden Homemade Garlic Breadsticks from your own oven is truly unmatched.
Essential Ingredients
Crafting these perfect Homemade Garlic Breadsticks requires only a few simple, high-quality ingredients. For the dough, you will need warm water, which is crucial for activating the yeast. Active dry yeast is the leavening agent, responsible for the breadsticks’ light and airy texture. A touch of granulated sugar not only feeds the yeast, encouraging it to bloom, but also adds a subtle sweetness that balances the savory notes. All-purpose flour forms the structure of the breadsticks, while salt enhances all the flavors in the dough. Finally, olive oil contributes to the dough’s tenderness and adds a nuanced richness.
The star of these breadsticks, the flavor-packed topping, is created with just three components. You will need unsalted butter as the base for the rich glaze. Garlic powder provides that essential savory kick without the raw bite of fresh garlic. Lastly, Italian seasoning, a fragrant blend of dried herbs like oregano, basil, rosemary, and thyme, infuses the butter with classic Mediterranean warmth, creating an irresistible garlic butter glaze. Sticking to these precise ingredients ensures consistency and maximum flavor in every bite.
The Double Glaze Technique
The secret to achieving maximum flavor and an enticingly golden crust on these Homemade Garlic Breadsticks lies in a clever technique: the double garlic butter glaze application. Many recipes suggest a single brush of butter, but by applying the seasoned butter mixture twice, you lock in an extraordinary depth of flavor.
The first application happens right before the breadsticks go into the oven. This initial coat of the rich butter infused with garlic powder and Italian seasoning allows the flavors to penetrate the dough as it bakes. The heat helps the butter seep into the developing crust, imparting a savory aroma and a beautiful golden hue.
The second application is just as critical. Immediately after the breadsticks emerge from the hot oven, still steaming and soft, they are brushed again with the remaining herb butter. At this stage, the porous, hot surface of the breadsticks readily absorbs the garlic butter glaze, creating a glossy finish and intensifying the aromatic garlic and herb notes. This two-stage process ensures that every part of the breadstick, from crust to crumb, is saturated with deliciousness, resulting in a truly unforgettable soft breadsticks recipe.
Step-by-Step Instructions
Creating these soft, flavorful breadsticks is a rewarding process. Follow these detailed steps for perfect Homemade Garlic Breadsticks every time.
1. Proofing the Yeast
Begin by preparing your yeast. In a large bowl, combine 1 cup of warm water. The water should be between 105-115°F (40-46°C), warm to the touch but not hot enough to kill the yeast. Sprinkle 2.25 teaspoons of active dry yeast over the water, followed by 1 tablespoon of granulated sugar. The sugar acts as food for the yeast, helping to activate it. Let this mixture rest undisturbed for 5 minutes. During this time, the yeast should become frothy and bubbly on the surface, indicating it is active and ready to work its magic. If no foam appears, your yeast may be old or the water temperature incorrect, and you should start again. This crucial first step ensures your baking yeast bread will rise properly.
2. Mixing and Kneading the Dough
Once your yeast is active, it is time to build the foundation of your dough. To the yeast mixture, stir in 2 tablespoons of olive oil, which adds richness and tenderness, followed by 1 teaspoon of salt to balance the flavors. Incorporate the first 2 cups of all-purpose flour. Mix this until a shaggy dough begins to form. Gradually add the remaining 1 cup of all-purpose flour, about one-quarter cup at a time, until the dough comes together and pulls away from the sides of the bowl.
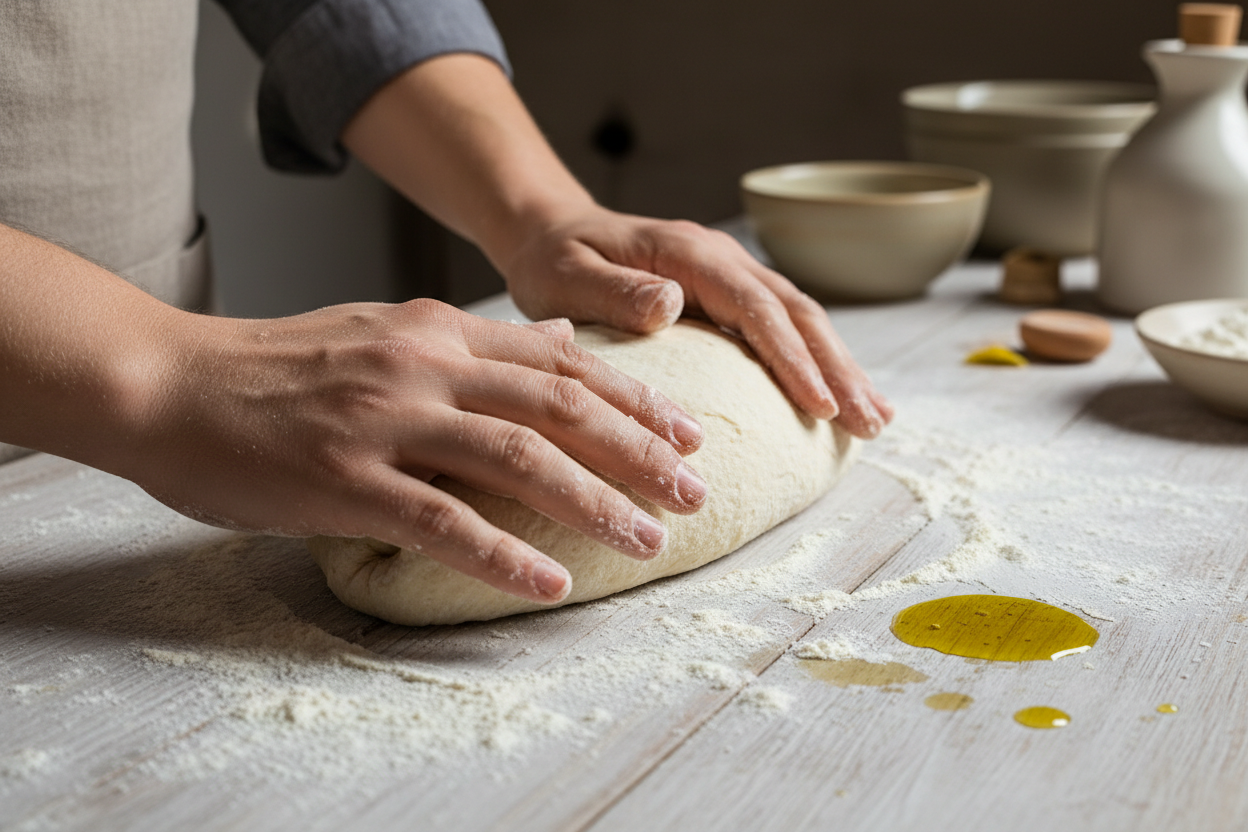
Transfer the dough to a lightly floured surface or attach the dough hook if using a stand mixer. Knead the dough for approximately 5 minutes. The goal is a smooth, elastic, and soft dough that springs back slightly when gently pressed. Proper kneading develops the gluten, which is essential for the chewy yet tender texture of perfect Homemade Garlic Breadsticks. This process can be easily achieved with a stand mixer bread dough hook or by hand.
3. The First Rise
Lightly grease a large bowl with a little olive oil. Transfer the kneaded dough to this bowl, turning it once to coat all sides with oil. This prevents the dough from drying out during the rise. Cover the bowl tightly with plastic wrap or a clean kitchen towel. Place the bowl in a warm, draft-free location. Allow the dough to rise for 60 minutes, or until it has doubled significantly in size. The warmth helps the yeast to become very active, creating a light and airy structure for your soft breadsticks recipe.
4. Shaping the Dough
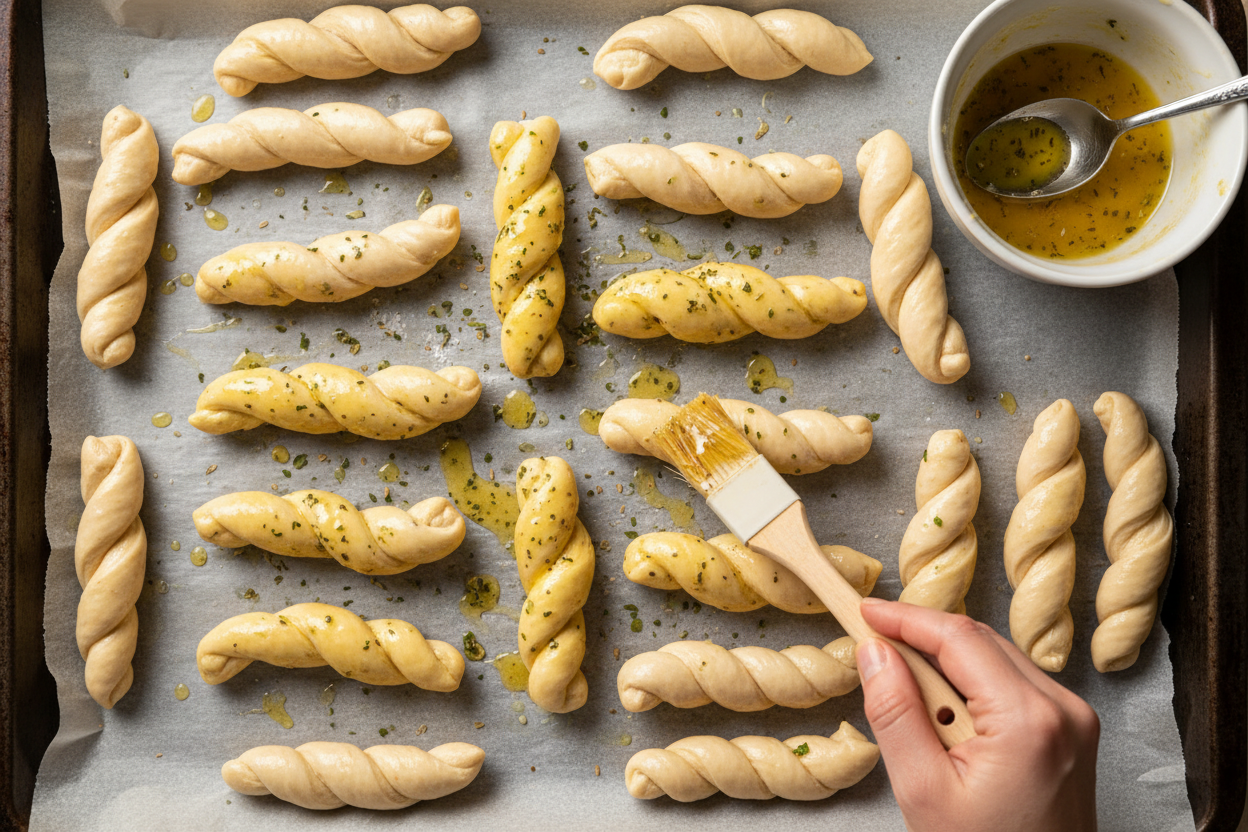
While the dough is completing its first rise, preheat your oven to 400°F (200°C). Line a large baking sheet with parchment paper to prevent sticking. Once the dough has doubled, gently punch it down to release the air. Transfer the dough to a lightly floured surface. Divide the dough into 12 equal portions. A kitchen scale can help ensure even sizing for consistent baking. Roll each portion into an 8-inch rope. Aim for consistency in thickness. Arrange these ropes on the prepared parchment-lined baking sheet, leaving a little space between each one to allow for expansion during baking. At this stage, they resemble slender pizza dough sticks, ready for their flavor coating.
5. First Butter Glaze
In a small microwave-safe bowl or saucepan, melt 0.25 cup of unsalted butter. Once melted, stir in 1 teaspoon of garlic powder and 1 tablespoon of Italian seasoning. Mix thoroughly until well combined. Using a pastry brush, evenly brush half of this fragrant garlic butter glaze over the unbaked dough ropes. This initial layer will infuse flavor directly into the bread as it bakes, creating a rich base.
6. Baking
Carefully transfer the baking sheet with the glazed breadsticks to the preheated oven at 400°F (200°C). Bake for 12 to 15 minutes. Keep a close eye on them, as oven temperatures can vary. The Homemade Garlic Breadsticks are ready when they turn a beautiful golden brown color and are puffed up. The kitchen will be filled with an incredible aroma of baking yeast bread and savory herbs.
7. Second Butter Glaze
As soon as you remove the breadsticks from the oven, immediately brush them generously with the remaining herb butter mixture. The heat of the breadsticks will help absorb the garlic butter glaze, making them incredibly moist, flavorful, and glossy. This final coat enhances the aroma and ensures a rich, buttery finish. Serve these warm, oven-baked treats without delay for the best experience.
Perfect Pairings
These incredibly flavorful and soft breadsticks are versatile, making them an excellent accompaniment to a wide array of dishes. Their savory garlic and herb profile makes them an ideal choice for pairing with pasta. Imagine dipping these warm, buttery sticks into the rich sauce of a spaghetti bolognese, a creamy fettuccine alfredo, or a hearty lasagna. They are also exceptional alongside a comforting bowl of hearty soup, such as a robust minestrone, a classic tomato bisque, or a creamy chicken noodle. For lighter fare, serve them with a fresh garden salad or a crisp Caesar salad, using them to sop up any delicious dressings. These Homemade Garlic Breadsticks elevate any meal, transforming a simple dinner into a more satisfying experience. They make a welcome addition as a pizza dough sticks alternative, providing a delicious vehicle for any Italian-inspired dish.
Storage and Reheating
Should you be fortunate enough to have any Homemade Garlic Breadsticks leftover, proper storage will help maintain their freshness. Once completely cooled, store them in an airtight container at room temperature for up to 3 days. To revive their warmth and softness, preheat your oven to 300°F (150°C). Place the breadsticks directly on a baking sheet and warm them in the oven for a few minutes, typically 5-7 minutes, until they are heated through and regain some of their initial tenderness. Avoid reheating in a microwave, as this can make them chewy.
These Homemade Garlic Breadsticks offer a truly delightful, from scratch side dish that will impress and satisfy. Their soft texture and rich garlic butter glaze make them an instant favorite.
If you enjoyed creating this soft breadsticks recipe, be sure to follow our community for more delicious ideas and cooking tips. Join us on Facebook for daily inspiration and culinary adventures: Follow our Facebook page here.
Soft & Buttery Garlic Breadsticks
Ingredients
- 1 cup Warm water Between 100-110 degrees Fahrenheit
- 2.25 tsp Active dry yeast Equivalent to one standard packet
- 1 tbsp Granulated sugar Helps feed the yeast
- 2 tbsp Olive oil Extra virgin preferred
- 1 tsp Salt Standard table salt or fine sea salt
- 3 cup All-purpose flour Divided use
- 0.25 cup Unsalted butter Melted
- 1 tsp Garlic powder Ensure it is fresh for best flavor
- 1 tbsp Italian seasoning Dried herb blend
Instructions
- Combine warm water, yeast, and sugar in a large mixing bowl. Let sit for 5 minutes until frothy.
- Add olive oil, salt, and 2 cups of all-purpose flour. Mix until combined, then gradually add the remaining 1 cup of flour until a soft, slightly tacky dough forms.
- Knead the dough for 5 minutes on a lightly floured surface. Place in a greased bowl, cover with a clean towel, and let rise for 60 minutes or until doubled in size.
- Preheat oven to 400F (200C). Punch down the dough and divide it into 12 equal pieces. Roll each piece into an 8-inch rope.
- Place the ropes onto a parchment-lined baking sheet. Melt the butter and stir in the garlic powder and Italian seasoning. Brush half of this mixture generously over the unbaked dough.
- Bake for 12 to 15 minutes until the tops are golden brown.
- Remove from the oven and immediately brush the hot bread with the remaining garlic herb butter. Serve warm.
For more daily recipes and tips, follow us on Facebook!
Click here to join our community!