Easy Greek Gyros: The Ultimate At-Home Experience
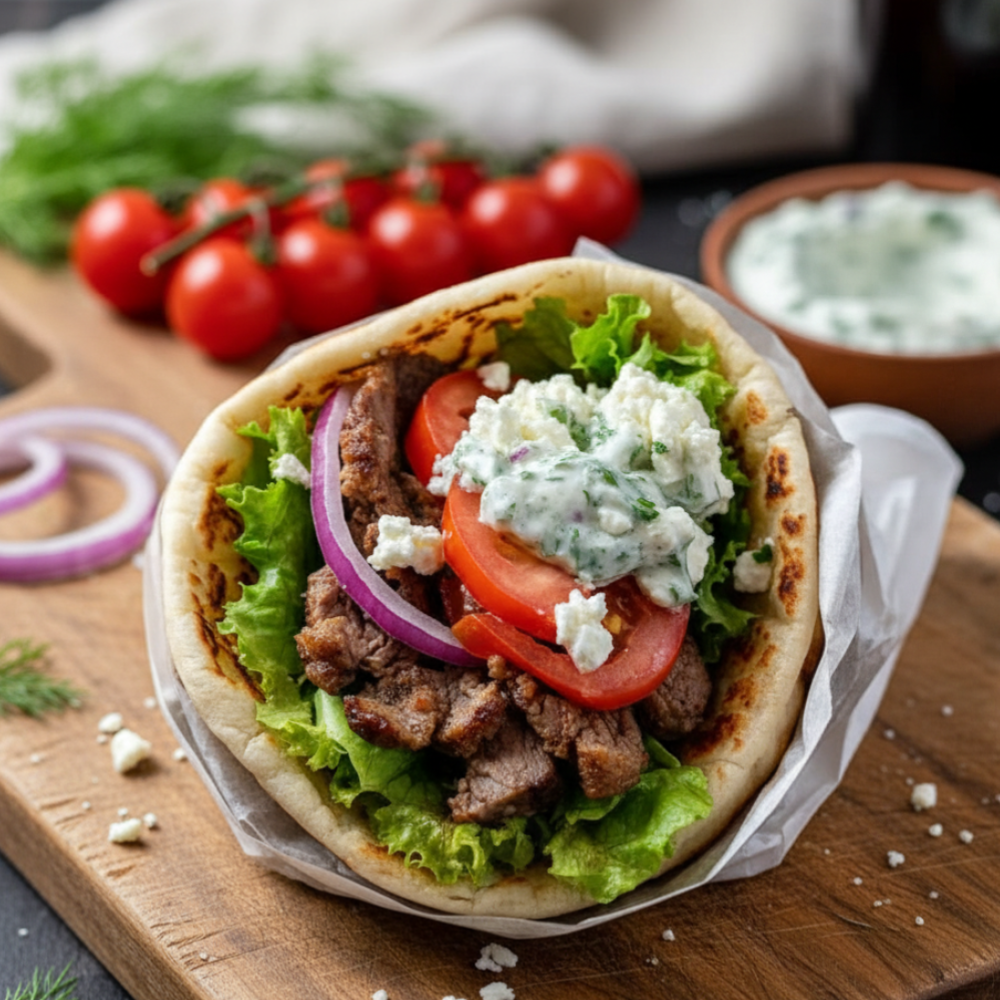
There’s nothing quite like the vibrant flavors and satisfying textures of authentic Greek street food. Imagine biting into tender, seasoned beef, crisp vegetables, and creamy homemade tzatziki, all nestled in a warm pita. While a trip to Greece might not be on the cards today, bringing that experience into your kitchen is surprisingly simple. This comprehensive Greek Gyros Recipe empowers you to craft incredible, restaurant-quality gyros right in your own home, perfect for a memorable weeknight dinner or a lively weekend gathering.
Why Make Your Own Beef Gyros?
For many of us, the allure of gyros comes from the savory, thinly sliced meat cooked on a vertical spit. Replicating that exact experience at home might seem daunting, but it’s actually easier and more rewarding than you think. Making homemade gyros gives you full control over the quality of your ingredients, ensuring fresh, wholesome flavors in every bite. You choose the cuts of beef, the freshness of your produce, and the perfect blend of spices for your `ground beef gyro meat`. This means a delicious meal tailored precisely to your preferences, free from questionable additives, and often much more cost-effective than takeout. Plus, the aroma filling your kitchen as the beef bakes is an experience in itself!
Essential Ingredients for Greek Gyros
Choosing the Best Beef
While traditional gyros might conjure images of various meats, this recipe focuses on a universally loved and accessible option: beef. We’ll be using high-quality ground beef, expertly seasoned and baked to create a dense, flavorful loaf that mimics the classic rotisserie texture when thinly sliced. The key is a good fat-to-lean ratio, typically 80/20 or 85/15, which ensures moisture and richness without being overly greasy. This approach makes fantastic `ground beef gyro meat` that’s both easy to prepare and incredibly delicious, delivering that signature savory depth you expect from this iconic `greek street food`.
Fresh Toppings and Tzatziki Sauce
A truly great gyro isn’t just about the meat; it’s a symphony of fresh ingredients. The accompaniments are absolutely non-negotiable for the perfect bite. Think juicy, ripe tomatoes diced small, crisp red onions thinly sliced for a slight bite, cool shredded lettuce, and a sprinkle of tangy crumbled feta cheese. But the real MVP of any gyro assembly is, without a doubt, the `homemade tzatziki sauce`. This cool, creamy cucumber-yogurt dip provides a refreshing contrast to the rich beef, tying all the flavors together. Making your own `authentic tzatziki ingredients` like Greek yogurt, fresh cucumber, garlic, dill, and a hint of olive oil ensures a vibrant, zesty condiment that elevates every single gyro.
Step-by-Step Instructions for the Perfect Beef Gyro
Let’s dive into creating your own incredible `beef gyro`. Follow these detailed steps for mouth-watering results.
For the Ground Beef Gyro Meat:
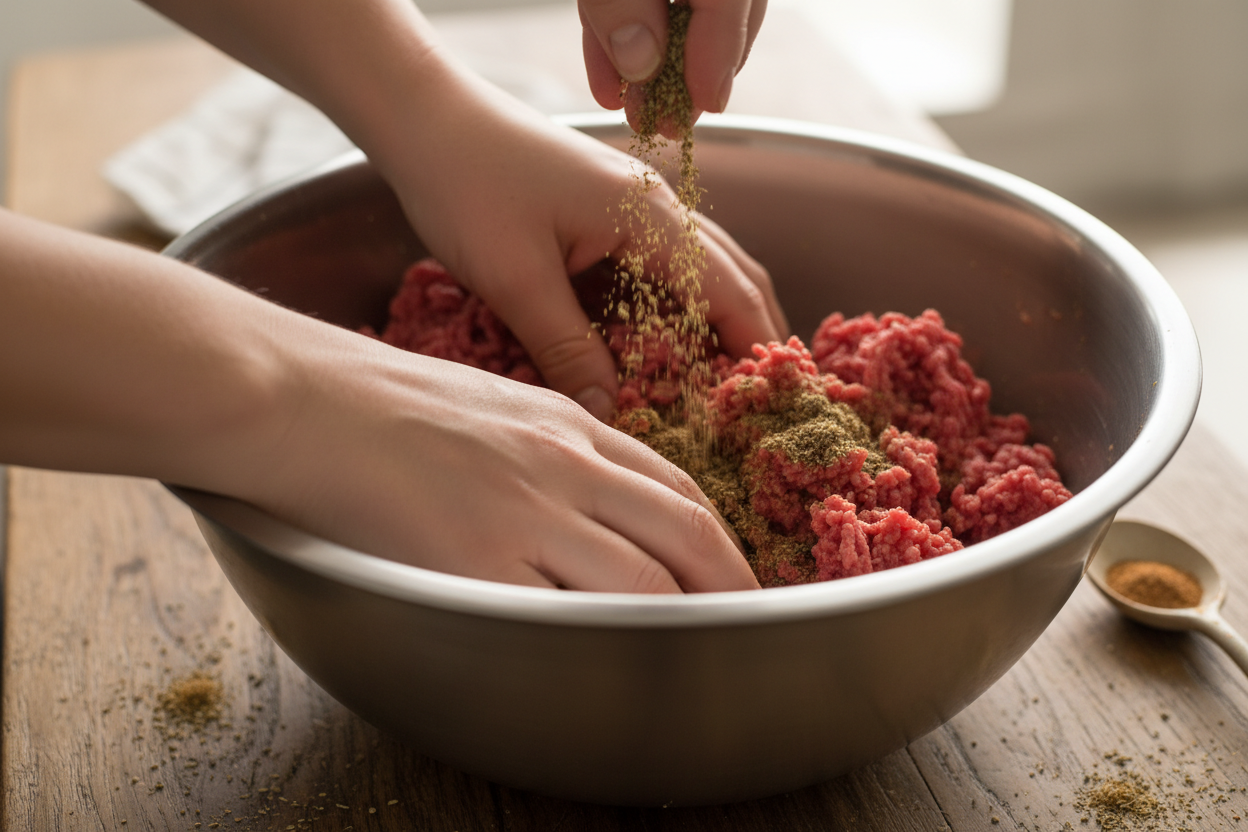
- Prepare the Beef: In a large bowl, combine 2 pounds of ground beef (80/20 or 85/15 is ideal) with the `gyro meat spice blend`. This blend typically includes onion powder, garlic powder, dried oregano, dried thyme, marjoram, a pinch of cumin, salt, and black pepper. You can also add a tablespoon of red wine vinegar for an extra layer of flavor.
- Mix Thoroughly: Using your hands, mix the beef and spices vigorously for at least 5-7 minutes. This is crucial for developing the meat’s texture, making it dense and cohesive, much like its rotisserie counterpart. The mixture should feel sticky and uniform.
- Shape the Loaf: Firmly press the seasoned beef mixture into a loaf pan (a standard 9×5 inch pan works well). Press down firmly to remove any air pockets and ensure a compact loaf.
- Bake the Meat: Preheat your oven to 325°F (160°C). Place the loaf pan on a baking sheet to catch any drips, and bake for 60-75 minutes, or until the internal temperature reaches 160°F (71°C). The meat should be firm to the touch and slightly browned on top.
- Rest and Chill: Once baked, remove the loaf from the oven. Carefully drain off any accumulated fat. Place a piece of foil directly on the meat and then place another loaf pan or heavy object on top to press it down. Let it cool at room temperature for about 30 minutes, then refrigerate for at least 2-3 hours, or preferably overnight. Chilling makes it much easier to slice thinly.
- Slice the Beef: Once chilled, remove the loaf from the pan. Using a very sharp knife or an electric slicer, shave the beef into very thin slices, as close to paper-thin as possible. This is key to achieving that authentic gyro texture.
For the Homemade Tzatziki Sauce:
- Prepare Cucumber: Grate half a large English cucumber (or 1 regular cucumber). Place the grated cucumber in a clean kitchen towel or paper towels and squeeze out as much excess liquid as possible. This prevents your tzatziki from becoming watery.
- Combine Ingredients: In a medium bowl, combine the squeezed cucumber with 1.5 cups of full-fat Greek yogurt (plain), 2-3 cloves of minced garlic (to taste), 2 tablespoons of fresh chopped dill, 1 tablespoon of fresh lemon juice, 1 tablespoon of olive oil, and a pinch of salt and pepper.
- Chill: Stir everything together until well combined. Cover and refrigerate for at least 30 minutes to allow the flavors to meld. The longer it chills, the better it tastes! This `homemade tzatziki sauce` is truly transformative.
Gyro Pita Assembly:
- Warm the Pitas: Lightly brush pita bread with a little water and warm them in a dry skillet over medium heat for 30 seconds per side, or microwave briefly until soft and pliable.
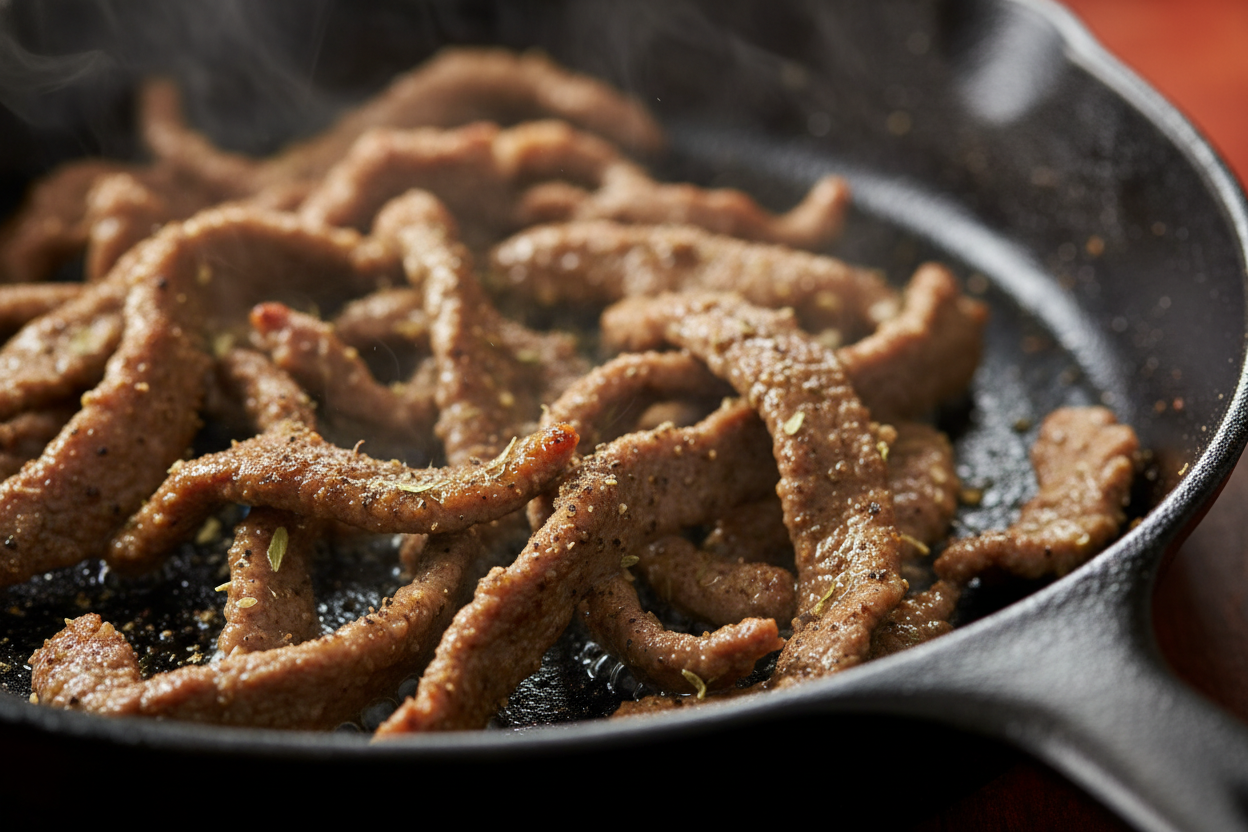
- Crisp the Beef: Just before serving, heat a little olive oil in a skillet over medium-high heat. Add your thinly sliced beef in batches and pan-fry for 1-2 minutes until warmed through and the edges are slightly crispy.
- Assemble Your Gyros: Lay a warm pita flat. Spread a generous amount of `homemade tzatziki sauce` down the center. Top with the warm, crispy beef slices. Add your desired fresh toppings: diced tomatoes, thinly sliced red onion, and shredded lettuce. A sprinkle of crumbled feta is also highly recommended.
- Fold and Serve: Fold one side of the pita over the fillings, then the other, or simply roll it up like a taco. Serve immediately and enjoy your incredible `gyro pita assembly`!
Expert Tips for Authentic Flavor and Texture
Getting Crispy Edges on Gyro Meat
One of the most satisfying elements of a classic gyro is the slightly crispy, caramelized edges of the meat. To achieve this restaurant-quality finish with your `ground beef gyro meat`, don’t skip the final pan-frying step. After thinly slicing your chilled beef loaf, heat a small amount of olive oil in a skillet or on a griddle over medium-high heat. Add your beef slices in a single layer and cook for just 1-2 minutes per side, or until they’re heated through and develop those delicious, browned, crispy edges. This quick sear adds an incredible depth of flavor and texture that truly elevates the experience.
Creating a Gyro Burrito or Gyro Bowl
While the traditional pita `gyro pita assembly` is classic, sometimes you want to mix things up. The beauty of this recipe is its versatility, making it fantastic for various `mediterranean dinner ideas`.
For a hearty `beef gyro burrito`, simply swap the pita for a large, soft flour tortilla. Load it up with all the same delicious ingredients – the crispy beef, `homemade tzatziki sauce`, and fresh veggies – then wrap it tightly for a portable, satisfying meal.
If you’re looking for a low-carb or gluten-free option, transform your gyros into a “Gyro Bowl.” Skip the pita entirely and create a vibrant bowl with a base of fresh lettuce or mixed greens. Pile high with your pan-fried beef, a generous dollop of tzatziki, and all your favorite toppings like tomatoes, onions, cucumbers, olives, and feta. This deconstructed version is just as flavorful and incredibly refreshing.
Storage and Make-Ahead Instructions
One of the best things about making your own `greek street food` is the potential for delicious leftovers and easy meal prep.
- Cooked Gyro Meat: The baked and sliced beef gyro meat can be stored in an airtight container in the refrigerator for up to 3-4 days. To reheat, simply pan-fry the slices in a little olive oil until warmed through and crispy.
- Homemade Tzatziki Sauce: Your `homemade tzatziki sauce` will keep well in an airtight container in the refrigerator for up to 5 days. Stir well before serving, as some separation might occur.
- Make-Ahead Prep: You can prepare the beef loaf and bake it a day or two in advance. Chill it overnight, then slice it when you’re ready to serve. The tzatziki can also be made ahead of time. This makes assembling fresh, delicious gyros incredibly quick on a busy weeknight.
Frequently Asked Questions (FAQs)
Can I use sliced flank steak instead of ground beef?
While this recipe specifically utilizes `ground beef gyro meat` for its unique texture and ease of preparation, you absolutely can experiment with sliced flank steak. If you choose to use flank steak, marinate it overnight in a similar `gyro meat spice blend` (oregano, garlic, onion, a touch of red wine vinegar). Then, grill or pan-sear the steak to your desired doneness, rest it, and slice it against the grain as thinly as possible. The flavor profile will be slightly different, but it makes for a delicious variation.
How do I keep my pita bread from tearing?
The key to pliable pita bread that doesn’t tear during `gyro pita assembly` is proper warming. Dry pita bread can be brittle. To make them soft and flexible, lightly sprinkle or brush them with a little water before warming. Then, heat them in a dry skillet over medium heat for about 15-30 seconds per side, or until they’re warm and puffy. You can also wrap them in a damp paper towel and microwave for 10-15 seconds. This added moisture and gentle heat will make them much easier to fold without cracking.
Is tzatziki sauce dairy-free?
Traditional `homemade tzatziki sauce` is made with Greek yogurt, which is a dairy product. Therefore, it is not dairy-free. However, if you are looking for a dairy-free alternative, you can make a very similar sauce using a plain, unsweetened dairy-free yogurt (such as coconut or almond-based yogurt). Ensure it has a thick consistency similar to Greek yogurt. Combine it with the same `authentic tzatziki ingredients` – grated cucumber, garlic, dill, lemon juice, and olive oil – for a delicious dairy-free version.
Thank you for exploring this delicious journey into homemade Greek flavors with us! For more mouth-watering recipes and culinary inspiration, be sure to follow us on Facebook: https://www.facebook.com/profile.php?id=61568538666337

Easy Homemade Beef Gyros
Ingredients
- 1 lb Ground beef 80/20 blend works best for moisture
- 4 whole Pita bread Warm before assembling
- 1 cup Lettuce Shredded
- 2 whole Tomatoes Sliced
- 1/2 whole Red onion Thinly sliced
- 1/2 cup Feta cheese Crumbled
- 1/2 cup Tzatziki sauce Store-bought or homemade
- 2 cloves Garlic Minced
- 1 tsp Dried oregano
- 1 tsp Ground cumin
- 1 tsp Salt
- 1/2 tsp Black pepper
Instructions
- Preheat your oven to 350°F (175°C).
- In a large mixing bowl, combine the ground beef, minced garlic, dried oregano, ground cumin, salt, and black pepper. Mix thoroughly until the meat becomes slightly tacky.
- Press the meat mixture firmly into an 8x4-inch loaf pan, ensuring there are no air pockets.
- Bake for 45 to 50 minutes, or until the internal temperature reaches 160°F (71°C).
- Remove the meatloaf from the oven, carefully drain any excess fat, and let it rest on a cutting board for 10 to 15 minutes.
- Slice the rested beef loaf as thinly as possible.
- Heat a large skillet over medium-high heat. Add the beef slices and pan-fry for 1 to 2 minutes per side until the edges are crispy and browned.
- Warm the pita breads in the microwave for 10 seconds or in a dry skillet over medium heat.
- Assemble the gyros by spreading a generous spoonful of tzatziki sauce on the center of each pita.
- Layer the crispy beef slices, shredded lettuce, sliced tomatoes, red onion, and crumbled feta cheese on top of the sauce.
- Fold the sides of the pita bread inward to wrap the filling, and serve immediately.
For more daily recipes and tips, follow us on Facebook!
Click here to join our community!