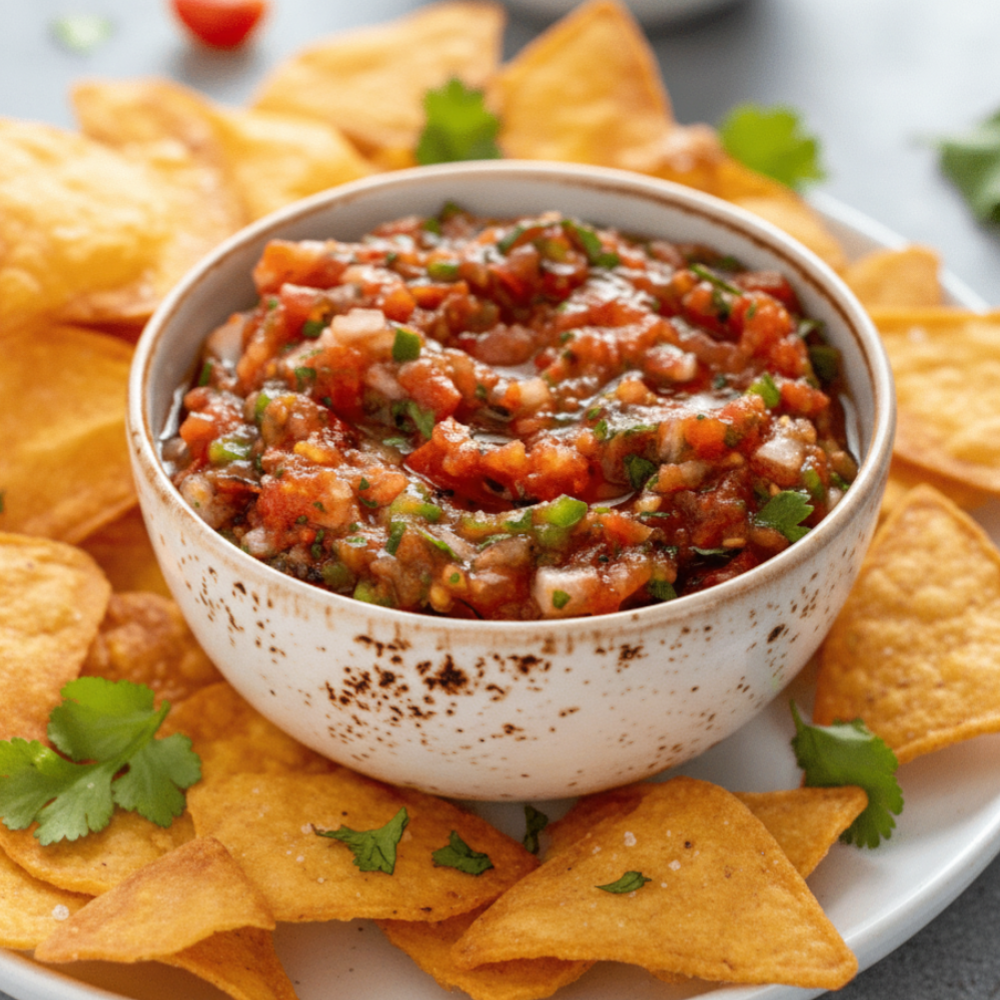
Fresh DIY Tomato Dip Guide
There is a distinct satisfaction that comes from serving a bowl of vibrant, homemade salsa. It transcends the experience of any store-bought jar. Crafting your own fresh tomato dip allows for unparalleled control over flavor, texture, and spice, creating a condiment that truly speaks to your palate. This guide focuses on creating a classic, chunky version, reminiscent of the best restaurant style salsa, perfect for any gathering or a simple snack.
Why Making Your Own is Worth It
The appeal of homemade salsa lies in its freshness and the ability to customize every element. Unlike processed alternatives that often rely on preservatives and artificial flavors, a DIY pico de gallo offers a burst of garden-fresh taste. You control the quality of every ingredient, ensuring a healthier and more flavorful outcome. This not only elevates your snacking experience but also provides a deeper connection to the food you consume. Preparing your own ensures you know exactly what goes into your authentic Mexican salsa, giving you peace of mind and superior taste. The effort, while minimal, yields substantial rewards in flavor and enjoyment.
Key Ingredients for Authentic Flavor
The foundation of any great homemade salsa rests on the quality of its salsa ingredients. Each component plays a crucial role in building a balanced and invigorating flavor profile. Simplicity is key, allowing the natural tastes of fresh produce to shine through.
Choosing the Best Tomatoes
For this particular recipe, Roma tomatoes are the ideal choice. These plum-shaped tomatoes have a firm flesh, fewer seeds, and a lower water content compared to other varieties. This makes them perfect for dicing, preventing the salsa from becoming too watery. Select Romas that are bright red, firm to the touch, and heavy for their size. Their robust flavor provides the sweet and tangy base essential for a rich fresh tomato dip. Avoid any tomatoes that are soft, bruised, or pale, as these will compromise the final taste and texture of your homemade salsa.
The Role of Cilantro and Lime
Fresh cilantro and fresh lime juice are non-negotiable components for an authentic Mexican salsa. Cilantro brings a distinct herbaceous, slightly peppery, and citrusy note that brightens the entire mixture. It is the signature flavor that distinguishes many traditional Mexican dishes. Always use fresh, vibrant green cilantro, avoiding any wilted or yellowed bunches. Lime juice, on the other hand, provides essential acidity. It acts as a natural flavor enhancer, cutting through the richness of the tomatoes and jalapeños, while also adding a refreshing zest. The acidity from the lime also helps to “cook” the other ingredients gently, melding their flavors together without heat. These two elements are crucial for achieving that characteristic bright and tangy profile often found in restaurant style salsa.
Step-by-Step Instructions
Creating this vibrant homemade salsa is a straightforward process, requiring minimal culinary expertise. Following these steps ensures a perfectly balanced and flavorful dip every time. Precision in preparation is key for optimal texture and taste.
Dicing and Mixing
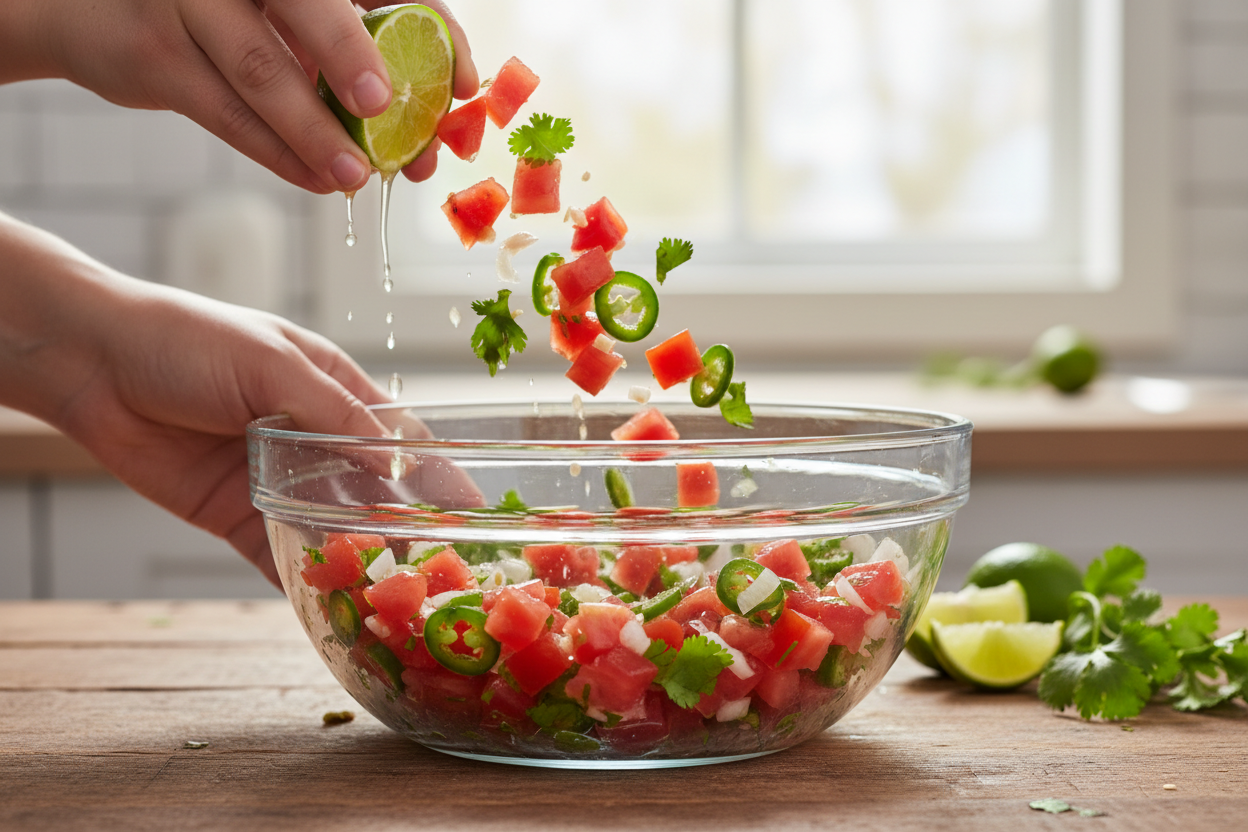
Begin by meticulously dicing your vegetables. Take 1.5 lbs of Roma tomatoes and dice them into small, even pieces. The consistency of the dice is important for a pleasant mouthfeel. Next, finely dice 1/2 cup of white onion. The smaller the dice, the more evenly its sharp flavor will distribute throughout the salsa. For heat, mince 2 jalapeños. If you prefer less spice, remove the seeds and membranes before mincing, as these contain most of the capsaicin. For more heat, leave some or all of the seeds.
Once diced, combine the tomatoes, white onion, and jalapeños in a medium-sized mixing bowl. Add 1/2 cup of freshly chopped cilantro. Ensure the cilantro is thoroughly rinsed and dried before chopping to prevent diluting the salsa. Finally, incorporate 2 tablespoons of fresh lime juice and 1 teaspoon of salt. Mix all ingredients gently but thoroughly with a spoon or spatula until everything is well combined. This initial mix allows the flavors to begin their fusion.
Resting the Mixture
After mixing, the salsa requires a period of rest. Cover the bowl tightly with plastic wrap and place it in the refrigerator. Allow the mixture to chill for at least 30 minutes. This resting period is critical for the flavors to meld and deepen. The lime juice and salt will draw out some of the natural juices from the tomatoes and onions, creating a more cohesive and flavorful fresh tomato dip. The chilling also enhances the refreshing quality of the salsa, making it even more enjoyable. While 30 minutes is the minimum, an hour or two will further improve the depth of flavor.
Preparing Crispy Tortilla Chips
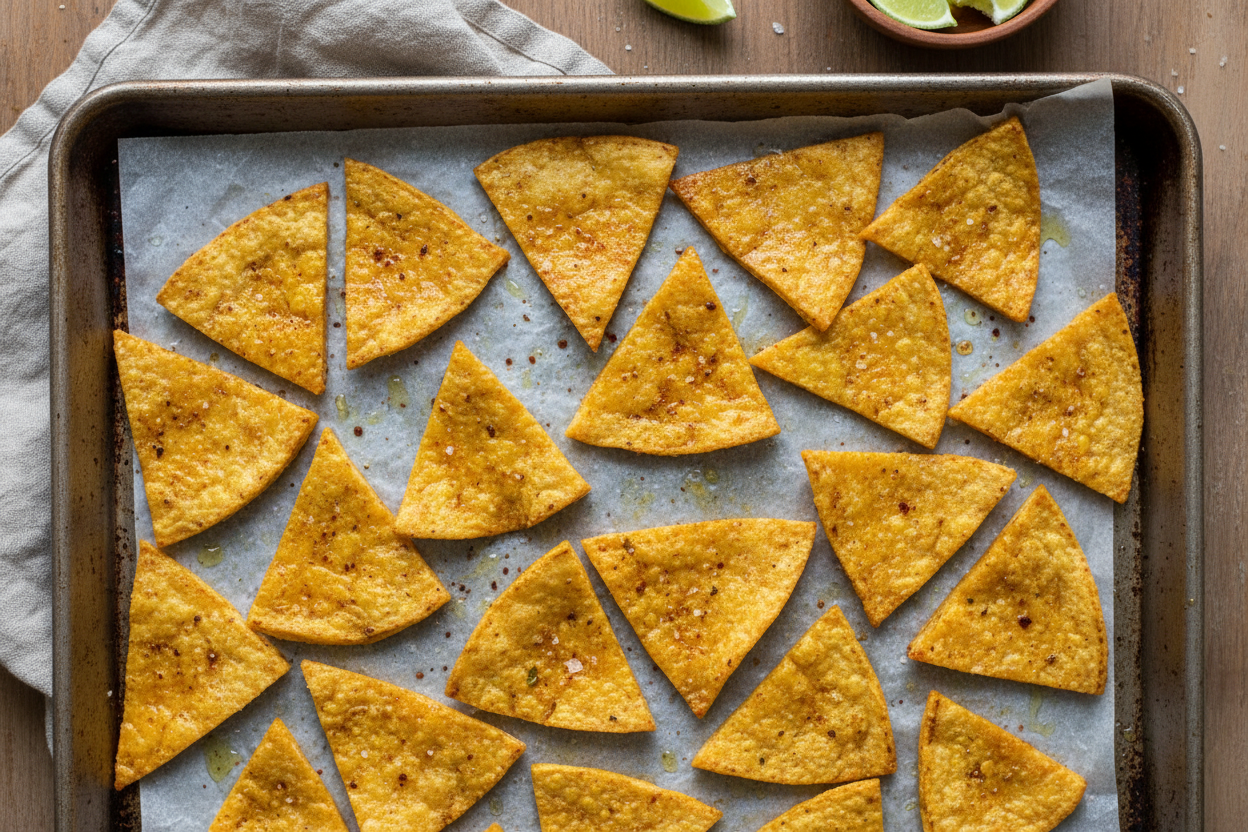
No homemade salsa is complete without the perfect accompaniment: crispy tortilla chips. While store-bought chips are convenient, making your own elevates the entire experience, providing a superior tortilla chips dip. Preheat your oven to 375 degrees Fahrenheit (190 degrees Celsius). Take 8 cut corn tortillas (you can cut whole corn tortillas into wedges yourself or purchase them pre-cut). In a separate bowl, toss these tortilla pieces with 2 tablespoons of vegetable oil, ensuring each piece is lightly coated. Spread the oiled tortilla pieces in a single layer on a baking sheet. Bake for 12 to 15 minutes, or until they are golden brown and crisp. Keep a close eye on them, as they can burn quickly. Once baked, remove them from the oven and let them cool on a wire rack. They will crisp up further as they cool. Serve these warm, crunchy chips alongside your freshly made DIY pico de gallo.
Storage and Freezing Tips
Proper storage is essential to maintain the freshness and flavor of your homemade salsa. This fresh tomato dip is best enjoyed within a few days of preparation. Transfer any leftover salsa into an airtight container. It can be safely stored in the refrigerator for up to 3-4 days. Over time, the texture may soften slightly, and the flavors will continue to deepen.
If you have a larger batch or wish to preserve your homemade salsa for an extended period, freezing is an option, though it may alter the texture slightly upon thawing. For freezing, it is often best to prepare a “blended salsa” version, as the chopping and freezing can make chunky ingredients softer. However, this chunky salsa can still be frozen. Place the salsa in freezer-safe bags or containers, leaving some headspace for expansion. It can be stored in the freezer for up to 2-3 months. When ready to use, thaw it in the refrigerator overnight. While it might be a bit softer, the flavor will remain excellent for a quick tortilla chips dip. For those interested in long-term preservation, exploring methods like canning salsa can offer an extended shelf life, though it involves a more complex process and additional equipment not covered here.
Frequently Asked Questions
Making your own homemade salsa often brings up a few common questions. Here are answers to help you perfect your fresh tomato dip.
Q: Can I use different types of tomatoes for this recipe?
While Roma tomatoes are recommended for their firmness and low water content, you can experiment with other varieties. Keep in mind that juicier tomatoes might result in a thinner salsa. If using very watery tomatoes, you might want to de-seed them more thoroughly or drain some of the liquid after dicing.
Q: How can I adjust the spice level?
The heat in this authentic Mexican salsa primarily comes from the jalapeños. To reduce the spice level, remove all seeds and membranes from the jalapeños before mincing. For a milder flavor, you can use fewer jalapeños or substitute them with milder green chilies. To increase the heat, leave some or all of the seeds in the jalapeños, or add an extra minced jalapeño.
Q: What if I don’t like cilantro?
Cilantro is a key flavor in this homemade salsa recipe, contributing significantly to its authentic taste. If you have an aversion to it, you can omit it entirely, but be aware the flavor profile will change considerably. Some people opt for a very small amount of fresh parsley as an extremely mild alternative, but it will not replicate the distinctive cilantro flavor.
Q: Can I make this a blended salsa instead of chunky?
Absolutely. While this recipe yields a chunky DIY pico de gallo, you can easily transform it into a smoother, blended salsa. After combining all the salsa ingredients, transfer them to a food processor or blender. Pulse a few times until your desired consistency is reached. Be careful not to over-blend, as this can result in a watery or frothy texture. Blended salsa often has a more uniform texture, making it excellent for drizzling or as a sauce base.
Q: How far in advance can I make this homemade salsa?
This fresh tomato dip is best made on the day it will be served, ideally at least 30 minutes before, to allow flavors to meld. However, it holds up well in the refrigerator for up to 3-4 days. The flavors will deepen over time, but the fresh, crisp texture is most prominent on the first day.
Crafting your own homemade salsa is a rewarding experience, delivering a depth of flavor that store-bought versions simply cannot match. With fresh ingredients and simple steps, you can create an authentic Mexican salsa that will impress.
For more delicious recipes and culinary inspiration, be sure to Follow our Facebook page.
Fresh Tomato Pico and Crispy Chips
Ingredients
- 1.5 lbs Roma tomatoes diced
- 1/2 cup White onion finely diced
- 2 Jalapeño peppers seeded and minced
- 1/2 cup Fresh cilantro chopped
- 2 tbsp Lime juice freshly squeezed
- 1 tsp Salt to taste
- 8 Corn tortillas cut into wedges for chips
- 2 tbsp Vegetable oil for baking or frying chips
Instructions
- In a large bowl, combine the diced tomatoes, finely diced white onion, minced jalapeño peppers, and chopped cilantro.
- Drizzle the fresh lime juice over the mixture and sprinkle with salt. Toss gently to combine all ingredients evenly.
- Cover the bowl and let the mixture rest in the refrigerator for at least 30 minutes to allow flavors to meld.
- Preheat the oven to 375 degrees Fahrenheit. Toss the corn tortilla wedges with vegetable oil and spread them in a single layer on a baking sheet.
- Bake the chips for 12 to 15 minutes until golden brown and crispy, then serve immediately with the chilled tomato dip.
For more daily recipes and tips, follow us on Facebook!
Click here to join our community!