
Whether you are planning a spirited Memorial Day gathering, a vibrant 4th of July celebration, or a relaxing Labor Day cookout, few dishes command attention quite like a magnificent rack of perfectly smoked beef ribs. While many traditionalists gravitate towards other barbecue staples, shifting focus to barbecued cattle ribs offers a profoundly richer, more intense flavor profile that harmonizes impeccably with classic summer cookout sides. This guide will walk you through achieving barbecue perfection, delivering tender, flavorful ribs that will be the undisputed star of your next outdoor feast.
Why Choose Barbecued Cattle Ribs for Your Next Cookout?
For those seeking a memorable centerpiece for their summer cookout ideas, barbecued cattle ribs present an unparalleled opportunity. Beef brings a depth of flavor that is inherently different from other meats, offering a robust, savory experience that stands up to the bold smoke and spice of traditional barbecue. When cooked low and slow, beef ribs transform into a succulent, fall-off-the-bone delicacy, brimming with smoky essence. The substantial size of these ribs, often referred to as “dinosaur ribs” when talking about their short rib counterparts, makes for an impressive presentation and ensures plenty for everyone at your gathering. They are a true testament to the art of low-and-slow cooking, promising a reward that is well worth the time invested.
Understanding the Cuts: Back Ribs vs. Short Ribs
Before you begin your barbecue journey, it is essential to understand the distinction between the cuts you might encounter at the butcher’s block. This knowledge ensures you select the right meat for your desired outcome and cooking timeline.
* Beef Back Ribs: These ribs are cut from the prime rib area of the steer, specifically the part that remains after the prime rib roast or ribeye steaks have been removed. They typically have less meat on top of the bone compared to short ribs but offer excellent flavor dueating to their proximity to highly marbled cuts. Beef back ribs cook faster and are often more readily available.
* Short Ribs (Dino Ribs): Often marketed as dinosaur ribs due to their impressive size and thickness, short ribs come from the plate, chuck, or brisket sections of the cow. They are much meatier and contain more connective tissue and fat, requiring a significantly longer cooking time to render down and become tender.
This comprehensive guide focuses specifically on beef back ribs. Their manageable cook time makes them an ideal choice for afternoon gatherings, allowing you to achieve spectacular results without dedicating an entire day to the smoker.
Gathering Your Ingredients
Precision is a hallmark of great barbecue, and having all your ingredients ready before you start is crucial. For this recipe, you will need the following:
* 2 racks of beef back ribs (approximately 4 lbs total)
* 2 tbsp Kosher salt
* 2 tbsp coarsely ground black pepper
* 1 tbsp garlic powder
* 1 cup of your favorite BBQ sauce
* 0.5 cup apple cider vinegar (for spritzing)
* 0.25 cup fresh chopped cilantro (for garnish)
These ingredients form the base of a classic beef dry rub and a simple yet effective spritz, designed to complement the rich flavor of the beef without overwhelming it.
Step-by-Step Smoking Instructions
Achieving perfectly tender and flavorful smoked beef ribs requires adherence to a methodical process. Follow these steps for an unforgettable barbecue experience, influenced by the robust flavors of Texas style barbecue.
1. Prepping the Smoker and Meat
Begin by preparing your smoker. Preheat it to a consistent smoking temperature for beef of 250°F (120°C). For optimal flavor, use wood chunks or chips of hickory or oak; these provide a robust smoke profile that beautifully complements beef. If you are using a pellet grill, select a blend suitable for red meat, making this an excellent addition to your pellet grill beef recipes repertoire.
While the smoker comes up to temperature, prepare your beef back ribs. Locate the thin, silvery membrane on the bone side of each rack. This membrane, if left on, can become tough and chewy, preventing the smoke and seasoning from fully penetrating the meat. Using a paper towel for a firm grip, carefully peel this membrane away from the bones. This step is critical for tenderness and flavor absorption.
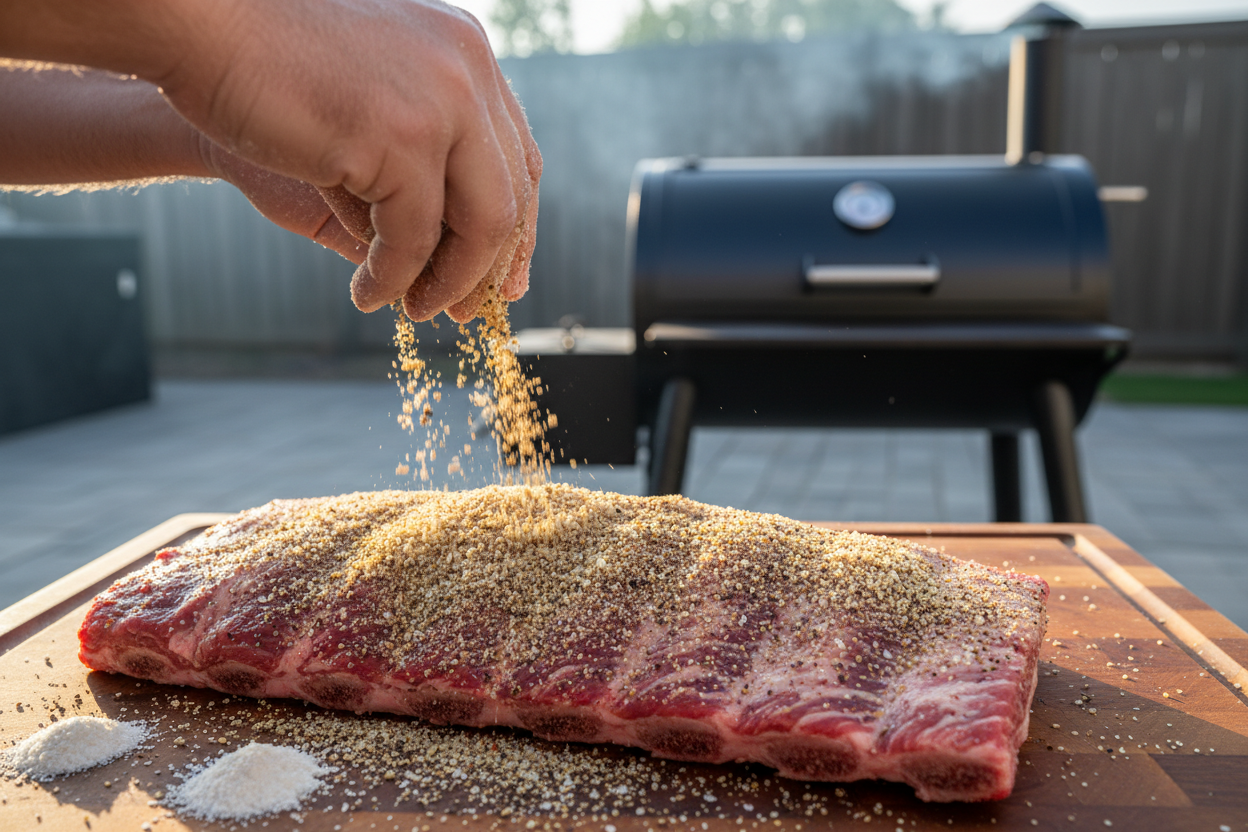
2. Applying the Dry Rub
In a small bowl, combine the 2 tbsp Kosher salt, 2 tbsp coarsely ground black pepper, and 1 tbsp garlic powder. This simple yet powerful blend forms your beef dry rub. Generously and evenly coat all sides of the beef back ribs with this mixture. Unlike much thicker cuts of beef that might benefit from a binder, the natural moisture on the surface of the ribs is usually sufficient to help the seasoning adhere effectively. Ensure every surface is covered to maximize flavor development.
3. The Initial Cook and Spritzing
Once the smoker is at 250°F (120°C), place the seasoned beef back ribs bone-side down directly on the grates. Close the lid and let them cook undisturbed for the first hour. This allows the smoke to penetrate deeply and begin forming a flavorful bark.
After the initial hour, begin spritzing. Lightly mist the ribs every 45 minutes with the 0.5 cup of apple cider vinegar. This spritzing helps to keep the exterior moist, promotes a beautiful bark formation, and adds a subtle tangy note that cuts through the richness of the beef. Continue this initial cooking and spritzing phase for a total of 3 hours. Maintain a steady smoking temperature for beef throughout this period.
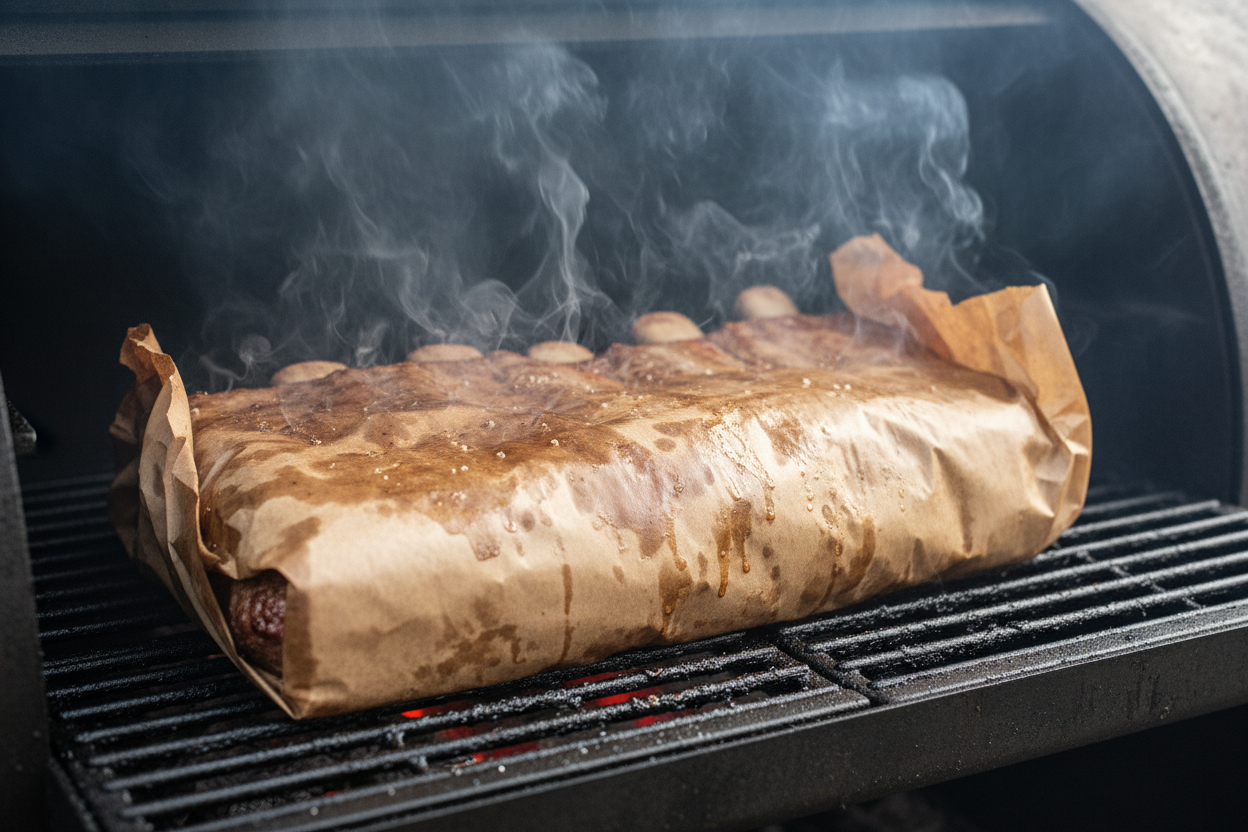
4. Wrapping to Lock in Moisture
After approximately 3 hours, the ribs should have developed a rich, mahogany-colored bark. At this point, it is time to wrap them. Take two large sheets of pink butcher paper or heavy-duty aluminum foil. Place each rack of ribs, meat-side up, on a sheet and wrap them tightly. The goal is to create a sealed packet that will steam the ribs, tenderizing them further while preserving moisture.
Return the wrapped ribs to the smoker. Continue cooking for about 2 additional hours, or until an instant-read thermometer probes the meat with zero resistance when inserted between the bones (aiming for an internal temperature around 203°F). This stage is crucial for achieving that desirable melt-in-your-mouth texture characteristic of great smoked beef ribs.
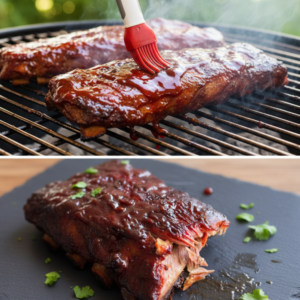
5. Glazing with BBQ Sauce
Once the ribs have reached the desired tenderness, carefully unwrap them. Brush the top generously with 1 cup of your favorite BBQ sauce. This sauce will create a glistening, flavorful glaze. Return the sauced ribs, unwrapped, to the smoker for an additional 15 minutes. This allows the glaze to set and become deliciously sticky, adding another layer of flavor that often defines Texas style barbecue.
6. Resting and Garnishing
Remove the glazed ribs from the smoker and transfer them to a clean cutting board. It is crucial to let them rest for at least 15 minutes before slicing. This resting period allows the muscle fibers to relax and reabsorb the juices, ensuring the ribs remain moist and tender. Skipping this step can result in dry ribs.
Once rested, slice the ribs between the bones into individual servings. Before presenting, sprinkle the 0.25 cup of fresh chopped cilantro over the top. The vibrant green cilantro adds a burst of fresh, herbal contrast that beautifully complements the rich, smoky beef.
Essential Tips for Tender Barbecue
Achieving consistently excellent barbecue requires attention to a few fundamental principles:
* Temperature Control: The key to tender smoked beef ribs is maintaining a steady and consistent 250°F (120°C) smoking temperature for beef. Avoid frequently opening the smoker lid, as this causes temperature fluctuations and prolongs cooking time. Use a reliable thermometer to monitor the smoker’s internal temperature.
* Patience: Barbecue is a slow art. Do not rush the resting period after cooking. Slicing the ribs too early will cause precious moisture to escape, resulting in a less juicy product. Allowing the ribs to rest for the full 15 minutes ensures maximum succulence.
* Wood Choice: For beef, stick with stronger, savory woods like hickory or oak. While fruitwoods like apple or cherry can be delicious with poultry, beef benefits from the robust, peppery notes these denser woods impart. This contributes significantly to the overall flavor profile, especially for those seeking a true Texas style barbecue experience.
These barbecued cattle ribs are more than just a meal; they are an event, a celebration of flavor and the slow art of smoking. Get ready to impress your family and friends with this recipe, perfect for any occasion.
For more mouth-watering recipes, tips, and behind-the-scenes glimpses into our barbecue adventures, be sure to follow our community on Facebook. We’d love to see your creations! Find us at our official Facebook page.
Best BBQ Beef Back Ribs
Ingredients
- 2 racks Beef back ribs Membrane removed
- 2 tbsp Kosher salt
- 2 tbsp Black pepper Coarsely ground
- 1 tbsp Garlic powder
- 0.5 cup Apple cider vinegar Placed in a spray bottle for spritzing
- 1 cup BBQ sauce
- 0.25 cup Fresh cilantro Finely chopped
Instructions
- Preheat your smoker to 250°F (120°C) using hickory or oak wood.
- Remove the thin membrane from the back of the ribs. Season all sides evenly with the Kosher salt, black pepper, and garlic powder.
- Place the racks on the smoker bone-side down. Cook for 3 hours, spritzing with apple cider vinegar every 45 minutes to prevent drying.
- Wrap the meat tightly in butcher paper or aluminum foil and return to the smoker for 2 hours, or until the internal temperature reaches 203°F (95°C) and the meat is tender.
- Unwrap the racks, brush generously with the BBQ sauce, and cook for 15 more minutes uncovered to set the glaze.
- Remove from the smoker, rest for 15 minutes, and garnish with fresh cilantro before slicing.
For more daily recipes and tips, follow us on Facebook!
Click here to join our community!