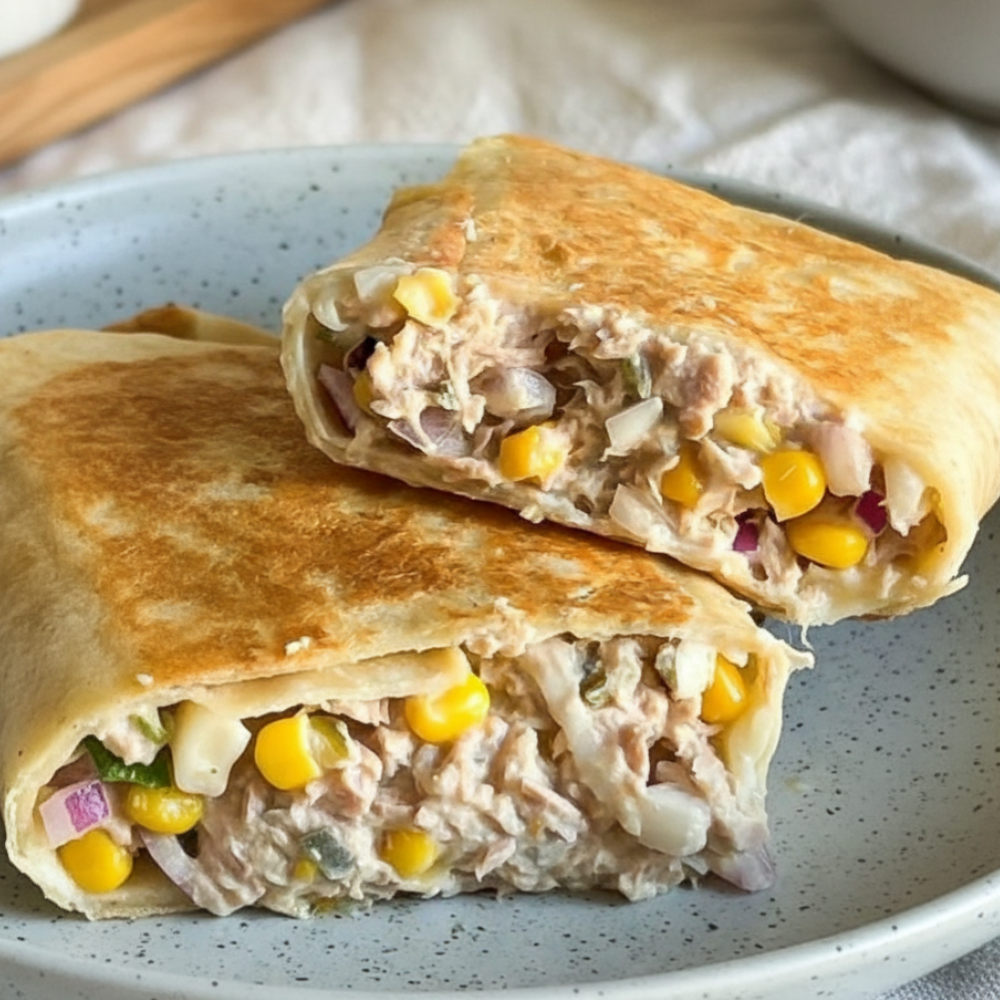
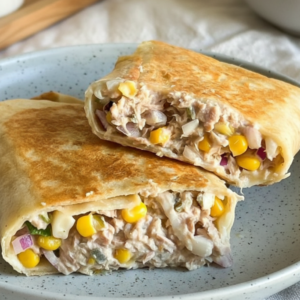
Fuel your day with a quick and satisfying meal that delivers on both flavor and nutrition. This 10-minute toasted tuna melt wrap offers a balanced combination of protein, healthy fats, and complex carbohydrates, making it an ideal choice for a healthy lunch meal prep. Crafted to provide sustained energy, this quick hot sandwich alternative ensures you stay productive throughout your afternoon, without the post-lunch slump. It transforms simple pantry staples into a delicious and hearty meal in mere minutes.
Why You Will Love This Recipe
- Speed: From prep to plate, this recipe is ready in under 10 minutes. It is perfect for those busy days when time is short but you still want a wholesome, home-cooked meal. Forget complicated steps or lengthy cooking times; this dish prioritizes efficiency without compromising on taste.
- Nutrition: Designed with dietitian-inspired macros, this dietitian approved lunch provides a robust serving of lean protein from the tuna, essential fiber from the tortillas and vegetables, and beneficial fats from the dressing. It is a smart choice for anyone looking for high protein lunch ideas that support a balanced diet and keep hunger at bay.
- Convenience: This recipe relies on readily available pantry staples, making it a go-to solution for impromptu meals. Ingredients like canned tuna, flour tortillas, and corn are often on hand, minimizing grocery trips and maximizing convenience. It is an excellent way to utilize common ingredients in new and exciting canned tuna recipes.
- Texture: Experience a delightful contrast with every bite. The exterior of the toasted tuna rollup achieves a golden, crispy texture from pan-frying, while the interior remains warm, creamy, and wonderfully melted. This textural interplay elevates a simple tuna salad tortilla into a truly satisfying experience.
Ingredient Breakdown
Each component of this pan-fried fish wrap plays a vital role in its flavor, texture, and nutritional profile. Here is a detailed look at the ingredients you will need:
- Canned Tuna (5 oz): This is the primary source of lean protein for our wrap. For the best flavor and texture, use chunk light or albacore tuna packed in water. Ensure it is well-drained to avoid a watery filling.
- Flour Tortillas (2 large, 8-inch): These serve as the flexible vessel for your tuna melt. Opt for large, 8-inch flour tortillas to accommodate a generous filling and ensure easy rolling. Whole wheat tortillas are an excellent high-fiber alternative, adding more nutritional value to your meal.
- Sweet Corn (1/4 cup): A quarter cup of sweet corn introduces a touch of natural sweetness and a pleasant pop of texture. It complements the savory tuna and adds a vibrant color to the mixture.
- Red Onion & Green Peppers/Pickles (2 tbsp each): Two tablespoons of finely diced red onion provide a sharp, pungent bite and crucial crunch. Similarly, two tablespoons of diced green peppers or pickles contribute a refreshing crispness and a tangy acidity that brightens the entire tuna salad.
- Creamy Dressing (3 tbsp): Three tablespoons of creamy dressing bind all the ingredients together, creating a cohesive and luscious filling. You can use mayonnaise for a classic flavor, Greek yogurt for a lighter, tangier profile, or a 50/50 mix of both to achieve a balance of creaminess and lightness.
- Shredded Cheddar Cheese (1/4 cup): This is the secret to a perfectly gooey and comforting tuna melt wrap. A quarter cup of shredded cheddar cheese melts beautifully when heated, helping to hold the filling together and adding a rich, savory depth.
Step-by-Step Instructions
Creating this delicious tuna melt wrap is straightforward. Follow these steps for a perfect result every time:
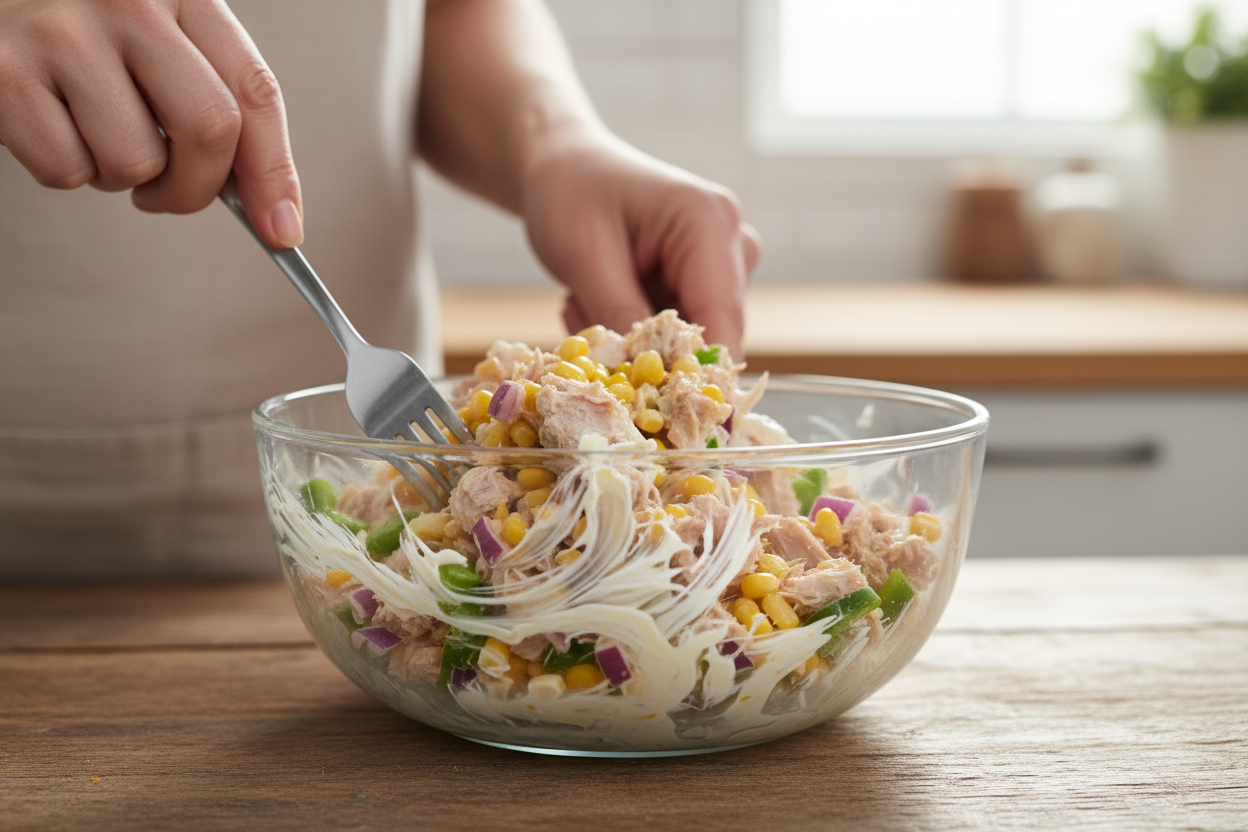
- Prepare the Salad: Begin by properly draining the 5 oz can of tuna. Press out as much liquid as possible to prevent a soggy wrap. Flake the drained tuna into a medium-sized bowl. Add the 1/4 cup of sweet corn, 2 tablespoons of finely diced red onion, and 2 tablespoons of diced green peppers or pickles to the bowl. Incorporate 3 tablespoons of your chosen creamy dressing (mayonnaise, Greek yogurt, or a mix). Season with a pinch of salt and pepper to taste, then mix everything thoroughly until well combined.
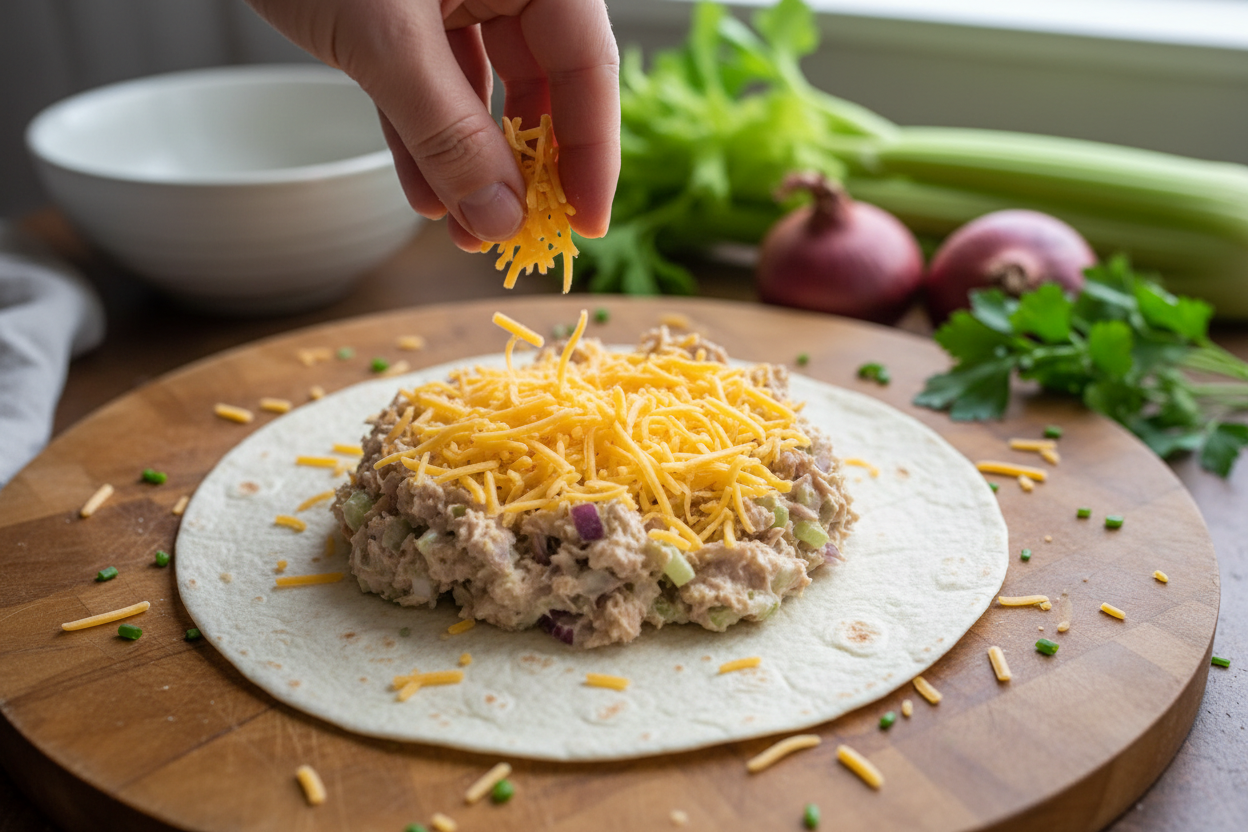
- Assemble the Portions: Lay out your 2 large, 8-inch flour tortillas on a clean work surface. Divide the tuna salad mixture evenly between the centers of the two tortillas. Do not overfill them, leaving enough space around the edges for wrapping. Sprinkle 1/4 cup of shredded cheddar cheese evenly over the tuna mixture on both tortillas.
- Wrap Tightly: To ensure the filling stays sealed during cooking, fold the sides of each tortilla inward, towards the center. Then, starting from the bottom edge, roll the tortilla up tightly. This technique creates a compact and secure wrap that prevents any filling from escaping.
- Grill/Pan-Fry: Heat a skillet or non-stick pan over medium heat. Place the rolled tortillas seam-side down in the hot skillet. This initial contact with the heat helps to seal the wrap. Cook for 2 to 3 minutes on each side, or until the tortillas are golden brown and crispy, and the cheese inside has melted into a warm, gooey consistency.
Expert Cooking Tips
Achieve the best possible toasted tuna rollup with these professional tips:
Always drain your canned tuna thoroughly. Excess moisture is the enemy of a crispy tortilla and can lead to a soggy texture.
- Drain Thoroughly: The most crucial step for preventing a soggy tortilla is to ensure your canned tuna is completely drained. Use a fork or a can lid to press out as much liquid as possible. This extra minute of effort will make a significant difference in the final texture of your wrap.
- Seam-Side Down: When placing your rolled tortillas into the hot skillet, always start with the seam-side down. The immediate heat will help to “glue” the seam shut, preventing the wrap from unrolling as it cooks. This ensures a neat and tidy presentation.
- Temperature Control: Maintain a consistent medium heat on your skillet. High heat will quickly burn the exterior of the tortilla before the cheese inside has a chance to melt properly. A moderate temperature allows for even browning and ensures a perfectly warm, gooey center.
Substitutions and Variations
Customize your tuna melt wrap to suit your preferences or what you have on hand:
- Dressing Swaps: For a different flavor profile or to increase healthy fats, consider using mashed avocado as a creamy binder instead of traditional dressing. Hummus is another excellent alternative that adds a Mediterranean twist and extra protein.
- Veggie Additions: Boost the nutrient content and flavor by incorporating other finely diced vegetables. Fresh spinach, seeds-removed diced tomatoes (to avoid excess moisture), or a sprinkle of finely chopped jalapeños for a touch of heat are all great options.
- Cheese Options: While cheddar cheese offers a classic melt, feel free to experiment with other varieties. Pepper jack cheese provides a spicy kick, provolone offers a mild, slightly nutty flavor, and Swiss cheese delivers a distinct, savory taste.
Storage and Meal Prep Advice
This healthy lunch meal prep option is versatile for busy schedules:
- Refrigeration: The tuna salad mixture can be prepared in advance and stored in an airtight container in the refrigerator for up to 3 days. This makes assembly quick and easy when you are ready to eat.
- Reheating: While best enjoyed immediately after cooking for maximum crispness, a cooked tuna melt wrap can be reheated. For the best results and to regain some of its crunch, use a toaster oven or an air fryer. Microwave reheating is possible but may result in a softer tortilla.
- Meal Prep Strategy: For ultimate efficiency, prepare a larger batch of the tuna salad mixture at the beginning of the week. Store it separately from the tortillas. When ready to eat, simply scoop the desired amount onto a tortilla, add cheese, wrap, and pan-fry. This strategy ensures a fresh, hot meal every time.
Frequently Asked Questions
Here are answers to some common questions about this tuna melt wrap recipe:
- Can I use corn tortillas instead of flour? While flour tortillas are recommended for their flexibility and ability to roll without breaking, corn tortillas can be used. However, they may be more prone to tearing. Gently warm corn tortillas before rolling to increase their pliability.
- How do I keep my tortilla from getting soggy? The key to preventing a soggy tortilla lies in thoroughly draining the tuna. Additionally, ensure the tuna salad mixture is not excessively wet. Cooking the wrap immediately after assembly also helps maintain its crispness.
- Is this recipe served hot or cold? This recipe is designed to be served hot, directly after pan-frying. The heat melts the cheese and crisps the tortilla, creating the signature “melt” experience. While the tuna salad itself can be eaten cold, pan-frying elevates it to a quick hot sandwich alternative.
This 10-minute tuna melt wrap offers a perfect solution for a quick, nutritious, and incredibly tasty meal. It is a smart choice for busy individuals and families seeking high protein lunch ideas that are both satisfying and easy to prepare. Whether you are meal prepping for the week or need a fast dinner, this pan-fried fish wrap delivers consistent quality and flavor. Give it a try and enjoy a versatile dish that truly sustains you.
For more delicious and easy recipes, follow our Facebook page: Visit Our Facebook Page.
Toasted Tuna Salad Tortillas
Ingredients
- 5 oz canned tuna drained well
- 2 large flour tortillas 8-inch diameter
- 1/4 cup sweet corn kernels canned or thawed frozen
- 2 tbsp red onion finely diced
- 2 tbsp green peppers or pickles finely diced
- 3 tbsp creamy dressing mayonnaise, Greek yogurt, or ranch
- 1/4 cup cheddar cheese shredded
- salt and black pepper to taste
Instructions
- In a medium mixing bowl, use a fork to flake the drained canned tuna.
- Add the corn kernels, diced red onion, diced green peppers (or pickles), creamy dressing, salt, and pepper to the bowl. Stir until the ingredients are thoroughly combined.
- Lay the flour tortillas flat on a clean work surface. Divide the tuna salad mixture evenly, placing it in the center of each tortilla.
- Sprinkle the shredded cheddar cheese evenly over the tuna salad on both tortillas.
- Fold the left and right sides of each tortilla inward over the filling, then roll tightly from the bottom upward to seal.
- Heat a skillet or grill pan over medium heat. Lightly coat with cooking spray if desired.
- Place the tortillas in the skillet seam-side down. Cook for 2 to 3 minutes until the bottom is golden brown and sealed.
- Carefully flip and cook the other side for an additional 2 to 3 minutes until golden brown and the cheese inside is melted. Serve immediately.
For more daily recipes and tips, follow us on Facebook!
Click here to join our community!