The arrival of peak summer brings an abundance of sweet, succulent corn. This seasonal delight, with its tender kernels and vibrant flavor, is a fleeting pleasure. To truly maximize your summer produce and enjoy its taste long after the season ends, understanding proper preservation techniques is essential. Learning how to freeze fresh corn allows you to capture that peak-season sweetness, ensuring your winter meals carry a taste of sunshine. This guide provides a direct, expert approach to **summer harvest storage**, helping you keep your vegetables tasting like they were just picked.
Why Blanching Matters: The Science of Preservation
Before you freeze fresh corn, a crucial step known as blanching is required. This process is not merely an extra chore; it is a fundamental aspect of effective **freezing vegetables**. Blanching corn on the cob involves briefly immersing the corn in boiling water, then rapidly cooling it. The primary purpose of blanching is to stop enzyme action. Enzymes are naturally occurring proteins in vegetables that, while beneficial for growth, continue to break down cells even in freezing temperatures. This breakdown leads to significant losses in flavor, texture, color, and nutritional value over time.
By blanching, you deactivate these enzymes. This brief heat treatment also helps to set the color of the corn, cleanse its surface, and soften it slightly, making it easier to pack. Without blanching, your stored corn would likely become tough, chewy, and develop an off-flavor within a few months. To effectively preserve sweet corn with its vibrant taste and texture, blanching is non-negotiable. It is the scientific cornerstone of successful, long-term **corn kernel preservation**.
Step-by-Step Guide to Processing Your Harvest
Properly freezing corn is a straightforward process when approached systematically. Follow these steps to ensure your corn retains its quality for months to come.
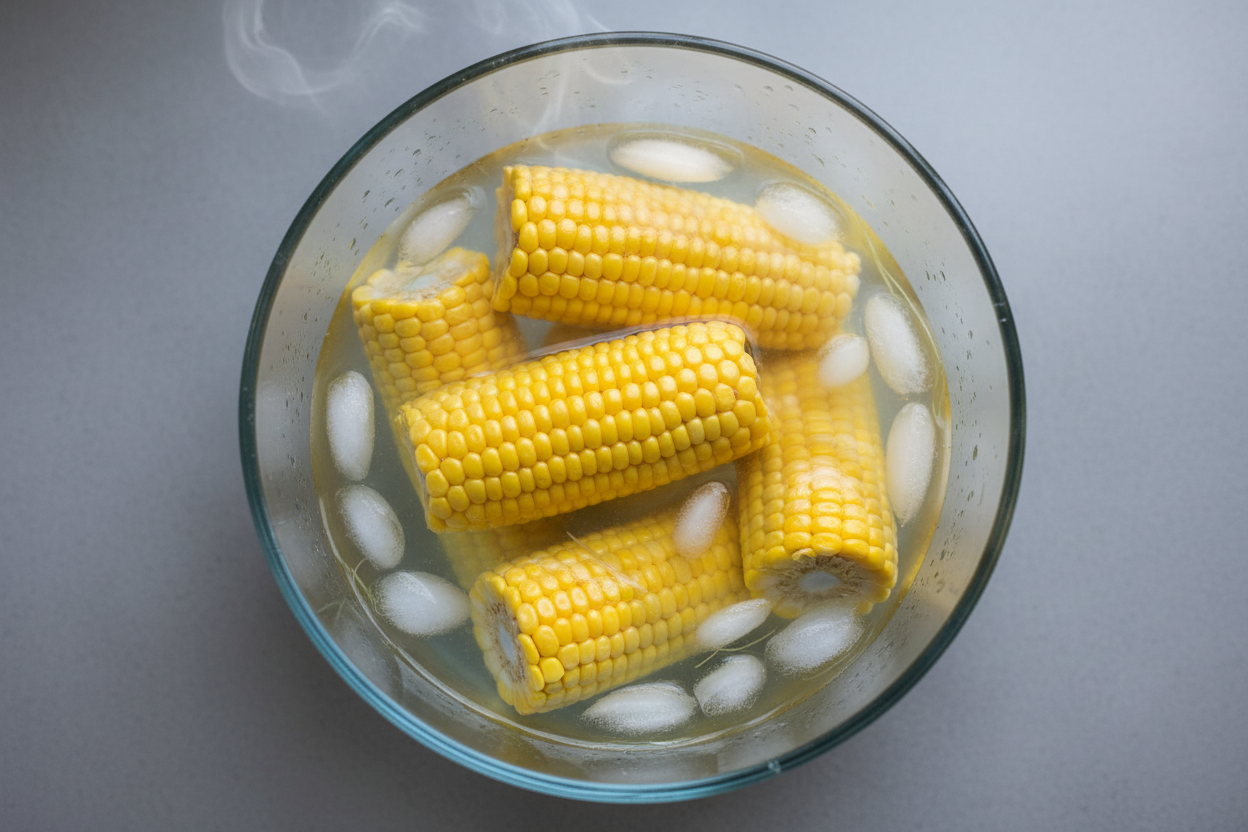
- Prepare the Corn and Water: Begin by selecting fresh, tender ears of corn. Shuck the corn, removing all husks and silks. Wash the ears thoroughly under cool running water. Set up a large stock pot of water and bring it to a rolling boil. Simultaneously, prepare a large bowl or tub filled with ice water, creating an ice bath for vegetables. This contrast is critical for stopping the cooking process.
- Blanch the Ears: Once the water is boiling vigorously, carefully place the shucked corn ears into the pot. Do not overcrowd the pot; work in batches if necessary to maintain the water temperature. Allow the corn to blanch for precisely 4 minutes. This duration is sufficient to halt enzyme activity without overcooking the corn.
- Cool Rapidly: Immediately after 4 minutes, use tongs or a slotted spoon to transfer the blanched corn from the boiling water directly into the prepared ice bath. Ensure the corn is fully submerged. Let the corn cool in the ice bath for the same amount of time it was blanched, approximately 4 minutes. This rapid cooling halts the cooking process and preserves the corn’s crisp texture and vibrant color.
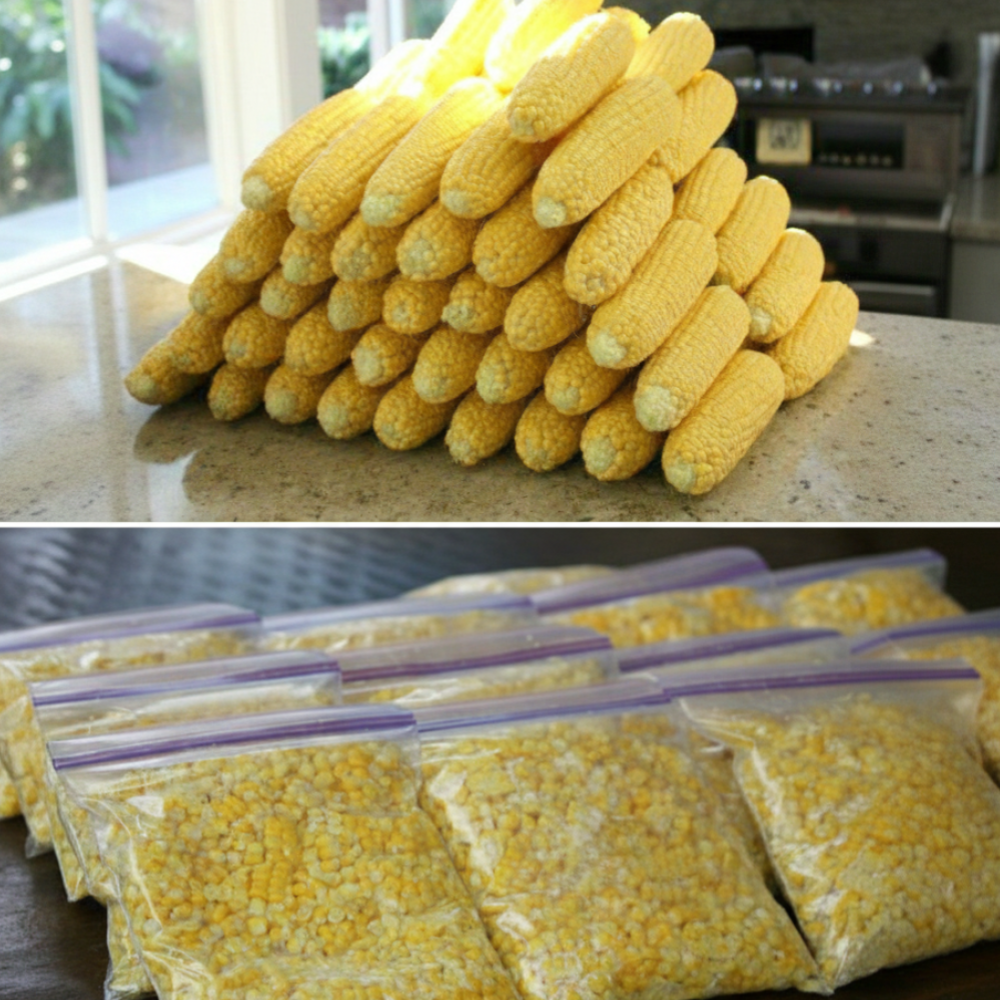
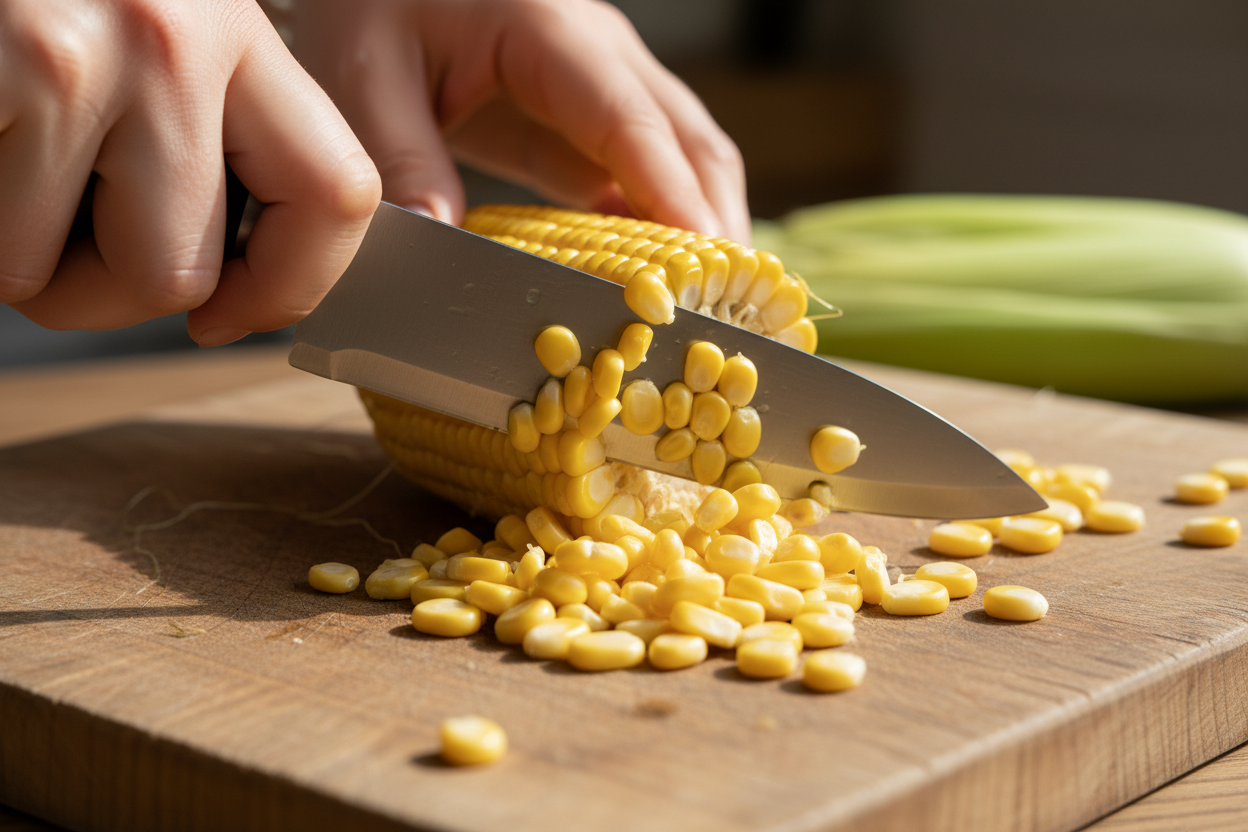
- Drain and Prepare for Freezing: Once thoroughly cooled, remove the corn from the ice bath and drain it well. Pat the ears dry with a clean kitchen towel. Excess moisture can lead to ice crystals and freezer burn. Using a sharp chef’s knife, carefully cut the kernels from the cob. Stand each ear upright on its flat end and slice downwards, allowing the kernels to fall into a bowl.
- Flash Freeze Kernels: To prevent the kernels from clumping together in the freezer, a flash-freezing step is recommended. Spread the fresh corn kernels in a single layer on baking sheets. Place the baking sheets in the freezer for 1-2 hours, or until the kernels are individually frozen solid.
- Package for Long-Term Storage: Once flash-frozen, transfer the loose kernels from the baking sheets into freezer-safe bags. Remove as much air as possible from the bags before sealing. Label each bag with the date of freezing. Store the bags flat in your freezer for optimal space utilization. This method ensures excellent corn kernel preservation.
Essential Tools for the Job
Having the right equipment makes the **freezing vegetables** process much smoother and more efficient. For freezing fresh corn, a few key items are indispensable.
- Large Stock Pot: A spacious pot is necessary for blanching several ears of corn simultaneously while maintaining a consistent water temperature.
- Sharp Chef’s Knife: A sharp knife is crucial for safely and efficiently cutting the kernels from the cob. A dull knife can be hazardous and lead to uneven cuts.
- Baking Sheets: These are vital for the flash-freezing step, allowing the corn kernels to freeze individually and prevent clumping.
- Freezer-Safe Bags: Heavy-duty freezer bags are designed to withstand freezing temperatures and help protect your corn from freezer burn.
- Large Bowl or Tub: Essential for creating an effective ice bath for vegetables immediately after blanching.
- Tongs or Slotted Spoon: For safely transferring hot corn from boiling water to the ice bath.
Investing in these basic tools will significantly streamline your efforts in storing fresh produce.
Tips for Vacuum Sealing
While freezer-safe bags are effective, utilizing a vacuum sealer takes your **corn kernel preservation** to the next level. Vacuum sealing corn provides an almost airtight seal, which offers superior protection against freezer burn and extends the shelf life of your frozen produce.
When using a vacuum sealer:
“Ensure kernels are completely dry before vacuum sealing. Any residual moisture can cause ice crystals to form, compromising the seal and quality.”
The key to successful vacuum sealing is to extract maximum air from the bag. Air is the enemy of frozen food, as it causes oxidation and freezer burn. Flash-freezing the kernels on baking sheets first is particularly beneficial before vacuum sealing. This prevents the corn from being crushed by the vacuum process and ensures that individual kernels remain separate, making them easier to portion out later. Vacuum-sealed corn can last for up to 12 months or even longer without a noticeable decline in quality.
FAQs: Thawing, Cooking from Frozen, and Shelf Life
You have successfully processed and stored your summer corn. Now, how do you use it?
Do I need to thaw frozen corn before cooking?
In most cases, no. Frozen corn can be added directly to many dishes, often yielding a better texture than if it were thawed first. For soups, stews, casseroles, or skillet dishes, simply add the frozen kernels directly. If you are making a cold salad where texture is paramount, a brief rinse under cold water or a quick steam might be beneficial.
How do I cook frozen corn?
Frozen corn cooks very quickly because it has already been blanched.
- Boiling: Bring a pot of water to a boil, add frozen corn, and cook for 2-3 minutes.
- Sautéing: Heat a small amount of butter or oil in a skillet, add frozen corn, and sauté for 5-7 minutes until heated through.
- Microwaving: Place corn in a microwave-safe dish with a tablespoon of water, cover, and microwave on high for 3-5 minutes, stirring halfway.
Always cook until the corn is tender and heated through.
What is the shelf life of frozen corn?
When properly blanched and stored in freezer-safe bags, **freeze fresh corn** can maintain its quality for 8-12 months. If you have utilized **vacuum sealing corn**, its shelf life can extend even further, up to 18 months, due to the superior protection against air exposure and freezer burn. Always ensure your freezer maintains a consistent temperature of 0°F (-18°C) or colder for optimal **storing fresh produce**.
Mastering the art of how to freeze fresh corn ensures that the vibrant taste of summer is always within reach. By following these straightforward steps for blanching corn on the cob and proper **corn kernel preservation**, you can enjoy delicious, high-quality corn throughout the year. It is a rewarding way to extend your **summer harvest storage** and savor seasonal flavors any time you desire.
For more expert tips on food preservation, seasonal recipes, and kitchen hacks, be sure to follow our Facebook page. We share fresh content regularly to inspire your culinary journey.
How to Store Sweet Corn for Winter
Ingredients
- 12 ears Fresh sweet corn Shucked and silks removed
- 16 cups Water For boiling
- 8 cups Ice For the cooling bath
Instructions
- Shuck corn and boil water.
- Blanch ears for 4 minutes.
- Transfer to ice bath.
- Cut kernels from cob and freeze flat on baking sheets before transferring to bags.
For more daily recipes and tips, follow us on Facebook!
Click here to join our community!