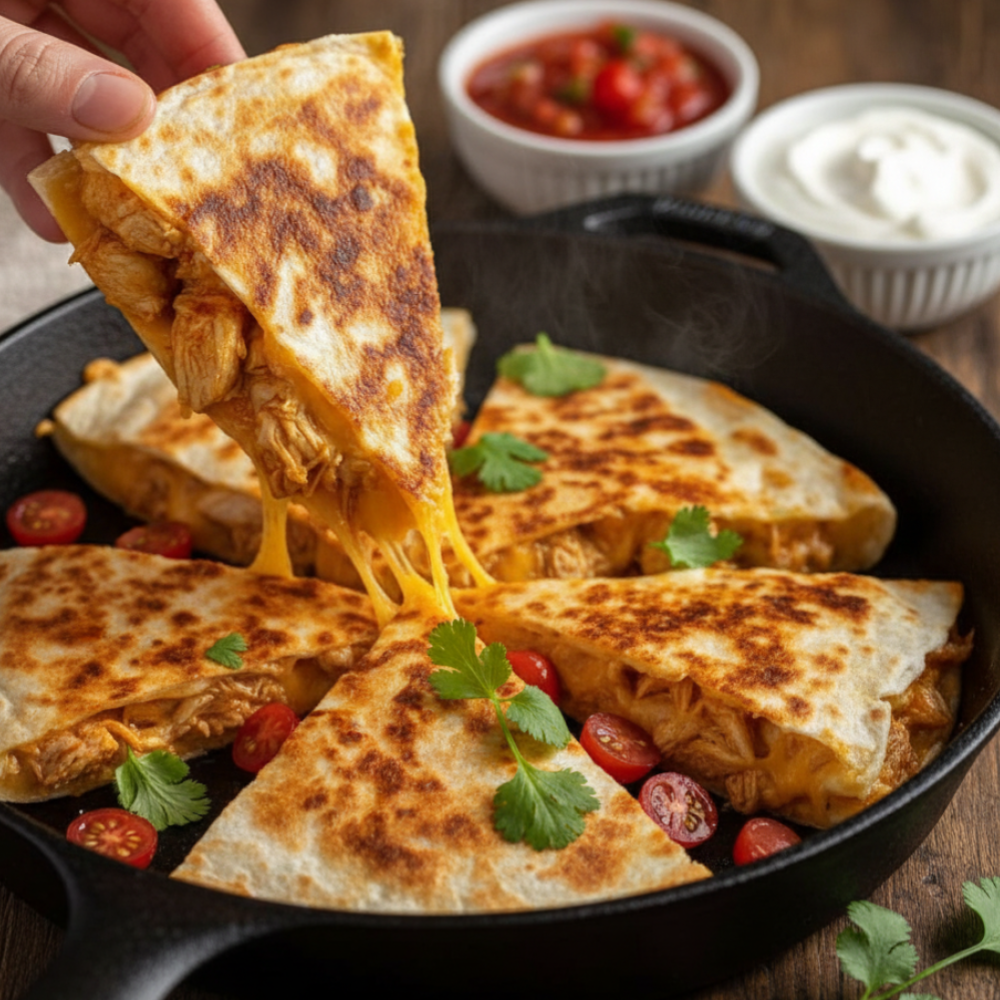
Welcome, fellow food lovers! Today, we’re diving into a culinary classic that’s a true champion of speed, flavor, and pure comfort: the humble yet mighty chicken and cheese quesadilla. Forget those limp, flavorless versions you might find elsewhere. We’re talking about a golden-brown, crispy tortilla shell encasing a molten core of savory shredded chicken and gooey, perfectly melted cheese. This isn’t just a snack; it’s a testament to simple ingredients coming together in delicious harmony, proving that a truly satisfying meal doesn’t have to be complicated or take hours to prepare.
Why You Will Love This Recipe
There’s a special magic about a well-made quesadilla, and this recipe captures it beautifully. You’ll fall head over heels for this dish because it’s:
- Incredibly Quick: Perfect for an easy weeknight dinner when time is of the essence. From pantry to plate in under 20 minutes!
- Customizable: A fantastic canvas for whatever ingredients you have on hand.
- Satisfying: The combination of tender shredded chicken and rich, melted cheese wrapped in a crispy tortilla is pure bliss.
- Family-Friendly: Kids and adults alike adore them, making mealtime a breeze.
- Budget-Friendly: Uses common, affordable ingredients without sacrificing flavor.
Once you master the technique for achieving that ideal crunch and perfect melt, this will quickly become a go-to in your recipe rotation.
Essential Ingredients
Greatness often starts with simplicity. For our ultimate quesadilla experience, you’ll need just a handful of key players:
- Cooked Shredded Chicken: About 1.5 cups. This can be leftover rotisserie chicken, boiled and shredded chicken breast, or even grilled chicken that you’ve prepped ahead.
- Large Flour Tortillas: 8-10 inches, about 4-6 count. Fresh, soft tortillas are key for folding and achieving that perfect texture.
- Cheese: 2 cups of a good melting cheese. A Mexican blend cheese is a classic choice, but feel free to experiment (see “Best Cheeses to Use” below).
- Butter or Oil: 1-2 tablespoons. Unsalted butter or a neutral oil like canola or vegetable oil for pan-frying.
- Optional Seasonings: 1 teaspoon chili powder, 1/2 teaspoon cumin, 1/4 teaspoon garlic powder, salt and pepper to taste. These really elevate the chicken’s flavor.
Step-by-Step Instructions
Ready to create quesadilla perfection? Follow these steps, and you’ll be enjoying a golden, cheesy masterpiece in no time.
Prepare Your Chicken: If your shredded chicken isn’t already seasoned, toss it in a bowl with your desired seasonings (chili powder, cumin, garlic powder, salt, and pepper). This ensures every bite is flavorful.
Heat the Skillet: Place a large skillet over medium heat. A cast iron skillet works wonders here for even heating and achieving super crispy tortillas, but any non-stick skillet will do. Add about half a tablespoon of butter or oil and let it melt and coat the bottom of the pan.
Lay Down the First Tortilla: Place one flour tortilla flat in the hot skillet. Allow it to warm for about 30 seconds to a minute. This makes it more pliable and helps it crisp up.
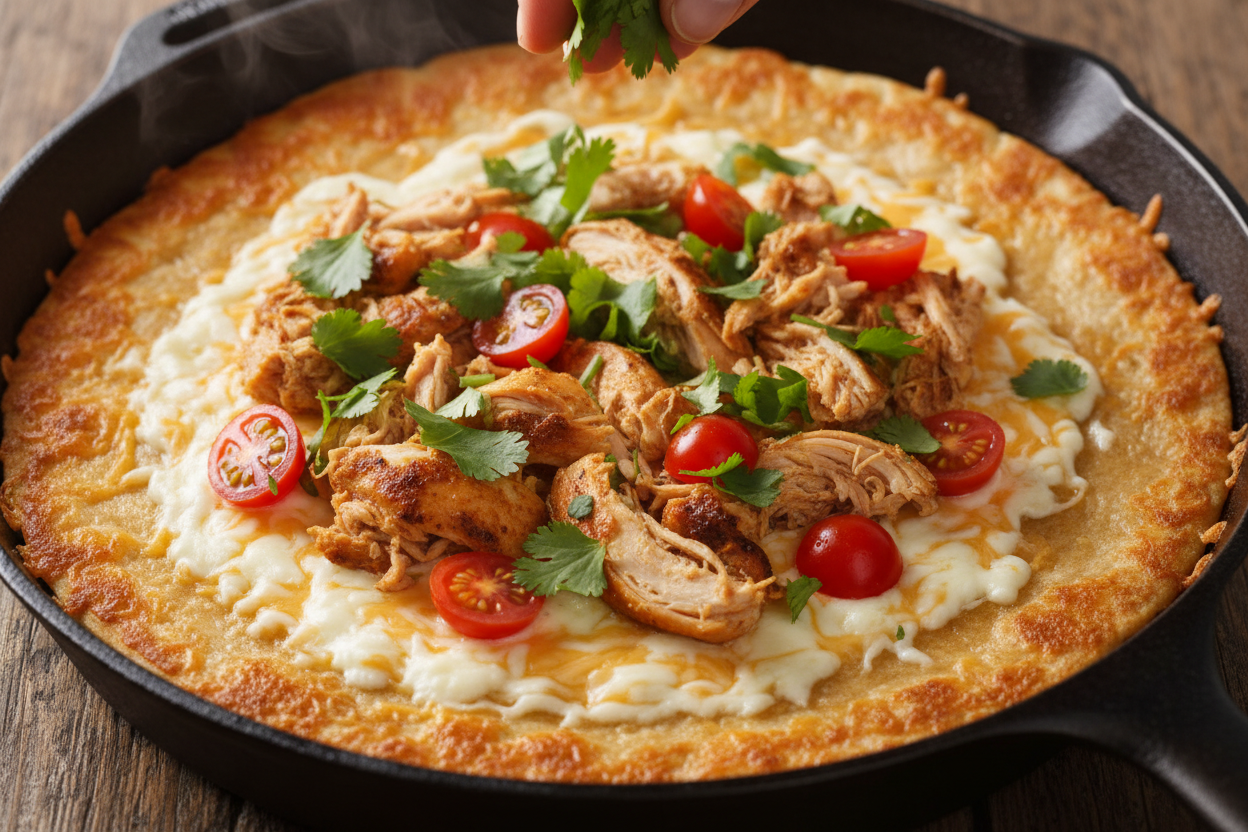
Layer the Cheese and Chicken: Sprinkle about 1/4 to 1/3 cup of your chosen cheese evenly over one half of the tortilla. Immediately follow with a generous layer of the seasoned shredded chicken, spreading it over the cheese. Then, sprinkle another 1/4 to 1/3 cup of cheese over the chicken. The double layer of cheese ensures maximum meltiness and helps bind everything together.
Cook Until Golden and Melted: Let the quesadilla cook undisturbed for 2-4 minutes, or until the bottom half of the tortilla is golden brown and the cheese is beautifully melted and bubbly. Keep an eye on the heat to prevent burning.
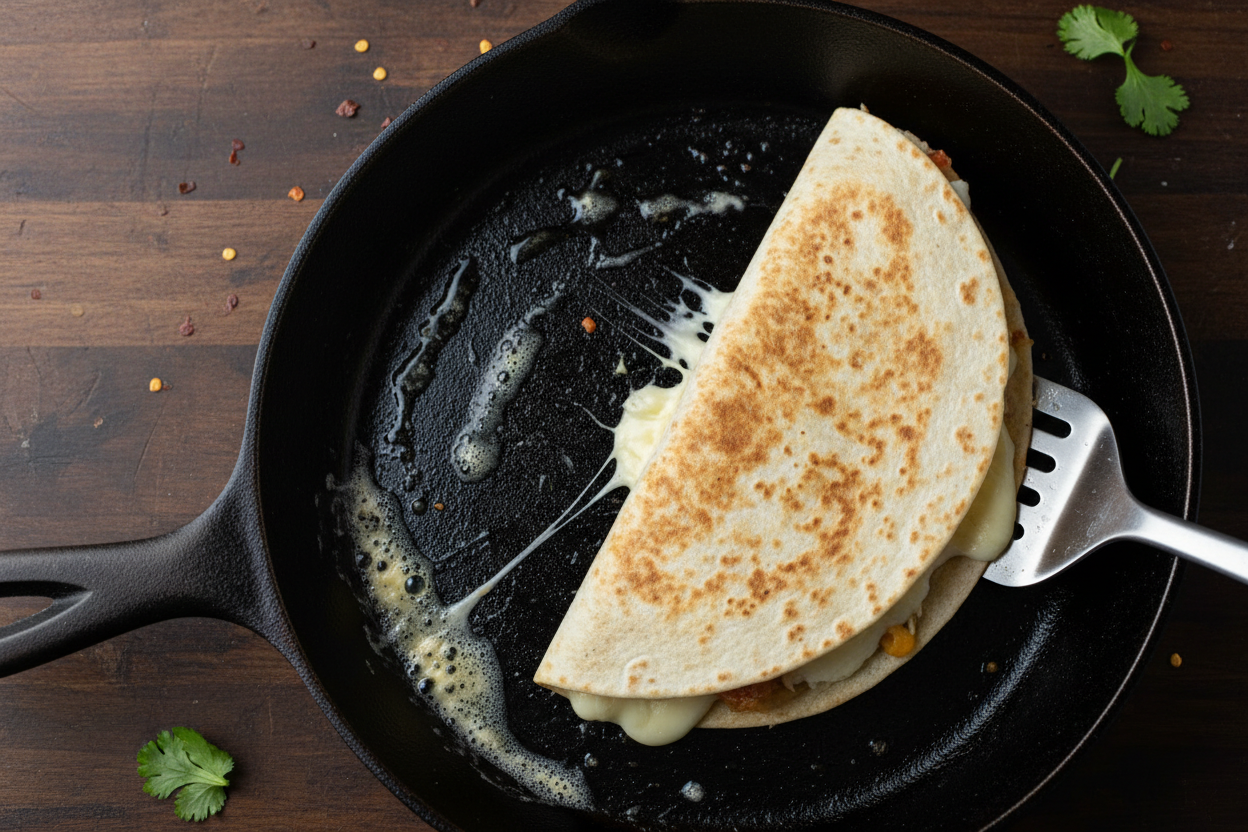
Fold and Crisp: Carefully use a spatula to fold the empty half of the tortilla over the filling, creating a half-moon shape. Gently press down on the quesadilla to encourage even browning and to fully adhere the melted cheese. Cook for another 1-2 minutes on this side until deeply golden brown and crisp.
Flip and Finish: Carefully flip the quesadilla over and cook for an additional 1-2 minutes on the other side until it’s also golden brown and crisp. The goal is a uniform, satisfying crunch.
Serve Immediately: Transfer the cooked quesadilla to a cutting board. Let it rest for a minute before slicing into wedges with a sharp knife or pizza cutter. Serve hot!
Repeat the process for the remaining tortillas, adding more butter or oil to the skillet as needed. Remember, cooking them one at a time ensures each pan-fried quesadilla gets the attention it deserves for that perfect crisp.
Pro Tips for Crispy Tortillas
Achieving that glorious crunch is easier than you think, but it does require a few key techniques:
- Medium Heat is Your Friend: Don’t rush it with high heat. Medium heat allows the tortilla to slowly toast and crisp without burning, giving the cheese time to fully melt.
- Don’t Skimp on Fat: A thin, even layer of butter or oil in the pan is crucial. It conducts heat and creates that desirable golden, crispy tortilla texture.
- Use a Cast Iron Skillet: Seriously, if you have one, use it! Cast iron retains heat beautifully and evenly, resulting in superior crispiness and browning. If not, a heavy-bottomed non-stick pan is your next best bet.
- Don’t Overfill: While tempting, too much filling can make the quesadilla difficult to fold and cook evenly, leading to a soggy middle. Stick to reasonable amounts of shredded chicken and melted cheese.
- Press Gently: After folding, gently press down on the quesadilla with your spatula. This ensures good contact with the hot pan, promoting even browning and helping the cheese glue the halves together.
Best Cheeses to Use
The right cheese is paramount for a truly satisfying experience. While Mexican blend cheese is a popular and excellent choice, don’t limit yourself!
- Mexican Blend: Often a mix of Monterey Jack, cheddar, asadero, and queso blanco. Melts beautifully and has a mild, savory flavor.
- Monterey Jack: Super meltable with a very mild, buttery flavor. A fantastic base cheese.
- Cheddar (Mild or Medium): Adds a sharper, more distinct flavor. Shred your own for superior melt!
- Asadero or Oaxaca: Traditional Mexican melting cheeses, offering incredible stretch and a creamy texture.
- Mozzarella (Low-Moisture, Part-Skim): Similar to Monterey Jack in its meltability and mildness.
For the best results, use freshly shredded cheese rather than pre-shredded bags. Pre-shredded cheeses often contain anti-caking agents that can hinder smooth melting.
“The secret to a truly outstanding quesadilla isn’t just the filling, but the harmonious contrast between the crunchy exterior and the molten, savory interior. It’s all about that textural bliss!” – Chef Elena Rodriguez
Variations and Add-ins
This recipe is incredibly versatile. Once you have the basic technique down, the possibilities are endless for customizing your perfect quesadilla.
- Veggies: Sautéed bell peppers and onions, corn, black beans, mushrooms, or even a handful of spinach can be added to the chicken and cheese.
- Spice It Up: Add a pinch of cayenne pepper, a dash of hot sauce to the chicken, or finely diced jalapeños for a kick.
- Different Proteins: While we’re focusing on shredded chicken, you could also use ground chicken, pre-cooked steak strips, or even just make it a pure cheese and veggie delight.
- Smoky Flavor: A sprinkle of smoked paprika can add a wonderful depth to your chicken filling.
- Herbs: Fresh cilantro or oregano can brighten the flavors.
Remember to cook any raw vegetables or proteins before adding them to your quesadilla to ensure everything is heated through.
Serving Suggestions and Sides
A great quesadilla deserves equally great companions. Here are some classic and creative quesadilla sides to complete your meal:
- Salsa: A must-have! Fresh pico de gallo, chunky tomato salsa, or a zesty salsa verde.
- Guacamole or Sliced Avocado: Creamy, rich, and utterly delicious.
- Sour Cream or Greek Yogurt: A cool, tangy counterpoint to the rich filling.
- Lime Wedges: A squeeze of fresh lime juice over the top brightens all the flavors.
- Refried Beans: A hearty and traditional side.
- Mexican Rice: For a more substantial meal.
- Corn Salad: A light and refreshing side, especially in warmer months.
- Hot Sauce: For those who love an extra kick.
Storage and Reheating
Quesadillas are best enjoyed fresh, but sometimes leftovers happen! Here’s how to store and reheat them:
- Storage: Allow the quesadillas to cool completely. Wrap individual wedges tightly in plastic wrap or aluminum foil, then place them in an airtight container. Store in the refrigerator for up to 2-3 days.
- Reheating (Best Method): To restore that desirable crispiness, reheat in a dry skillet (preferably a cast iron skillet) over medium-low heat for 3-5 minutes per side, or until heated through and crisp again.
- Oven Reheating: You can also reheat them on a baking sheet in a preheated oven at 350°F (175°C) for about 10-15 minutes, flipping halfway, until warm and crispy.
- Microwave (Not Recommended for Crispness): While convenient, microwaving will make your tortillas soft and potentially soggy. Only use if crispiness isn’t a priority.
Frequently Asked Questions
Can I make quesadillas ahead of time?
While best fresh, you can prep the shredded chicken filling in advance and store it in the refrigerator for up to 3-4 days. Then, it’s just a quick assembly and cook when you’re ready to eat.
What kind of tortillas are best?
Soft flour tortillas (8-10 inches) are generally best for folding and achieving that perfect crisp. Corn tortillas can also be used, but they tend to be less pliable and can break more easily when folded, so you might consider making open-face quesadillas or two tortillas pressed together for those.
My quesadilla is soggy. What went wrong?
Sogginess usually comes from overcrowding the pan, insufficient heat, or too much filling. Ensure your skillet is hot, use a little butter or oil, cook one at a time, and don’t overfill. Allowing moisture from the chicken or other add-ins to escape by cooking them down a bit first can also help.
Can I freeze quesadillas?
Yes, you can! Once cooked and cooled, wrap individual quesadilla wedges tightly in plastic wrap and then aluminum foil. Place in a freezer-safe bag. They can be frozen for up to 1-2 months. Reheat from frozen in a preheated oven or skillet for a quick meal.
There you have it – your complete guide to mastering the ultimate Chicken Cheese Quesadilla! This dish is truly a culinary MVP, ready to rescue your weeknights and delight your taste buds. Experiment with the seasonings, play with the fillings, and most importantly, enjoy the process of creating something truly delicious with your own hands.
Happy cooking, and don’t forget to share your delicious creations with us! Follow our food adventures for more recipes and tips on our Facebook page: Our Facebook Page. We’d love to see what you’re cooking up!

Ultimate Chicken Cheese Quesadilla
Ingredients
- 2 large Flour tortillas
- 1 cup Shredded chicken Pre-cooked
- 1 cup Mexican cheese blend Shredded
- 1/4 cup Cherry tomatoes Halved
- 2 tbsp Fresh cilantro Chopped
- 1 tbsp Butter Divided
- 1/4 cup Salsa For serving
- 1/4 cup Sour cream For serving
Instructions
- Heat a cast iron skillet over medium heat and melt half of the butter.
- Place one flour tortilla in the skillet and sprinkle half of the cheese evenly over it.
- Distribute the shredded chicken, cherry tomatoes, and cilantro over the cheese.
- Top with the remaining cheese and place the second tortilla on top.
- Cook for 3 to 4 minutes until the bottom tortilla is golden brown and crispy.
- Carefully flip the quesadilla, adding the remaining butter to the skillet, and cook for another 3 minutes until the cheese is fully melted.
- Remove from the skillet, let it rest for a minute, then slice into wedges.
- Serve immediately with salsa and sour cream on the side.
For more daily recipes and tips, follow us on Facebook!
Click here to join our community!