Homemade Peppermint Cocoa: The Ultimate Holiday Treat
As the days grow shorter and the air turns crisp, there’s nothing quite like wrapping your hands around a warm mug of something wonderfully comforting. And when it comes to classic winter beverages, few can rival the nostalgic charm and vibrant flavor of homemade Peppermint Cocoa. Forget those bland, pre-packaged mixes; this year, treat yourself and your loved ones to a truly exquisite experience that elevates a simple drink into a creamy, festive holiday tradition. Our rich, from-scratch peppermint hot chocolate recipe is guaranteed to become a highlight of your Christmas morning beverages and cozy evenings.
Why Scratch-Made Beats Store-Bought Mixes
You might wonder if making Peppermint Cocoa from scratch is truly worth the effort when so many instant mixes line grocery store shelves. The answer, without a doubt, is a resounding YES! The difference is night and day, transforming a mundane drink into one of the most memorable creamy holiday drinks you’ll ever savor.
The difference in texture (creamy vs. watery): Store-bought mixes often dissolve into a thin, watery liquid, lacking the luxurious mouthfeel you crave. Our homemade version, however, achieves an unparalleled creaminess. This isn’t just about taste; it’s about the entire sensory experience – the way the rich liquid coats your tongue, leaving a lasting impression of indulgence.
Controlling sweetness and ingredient quality: With a DIY hot cocoa mix, you are the master of your mug. You choose the quality of cocoa, the type of milk, and the exact amount of sweetness. This means no overly sugary concoctions and no mystery ingredients. You get to select pure, high-quality components that elevate the flavor profile of your Peppermint Cocoa.
Avoiding artificial preservatives: Many commercial mixes are laden with artificial flavors, colors, and preservatives designed for shelf life, not for taste or health. Crafting your own festive hot chocolate means you know exactly what’s going into your cup: wholesome ingredients that taste genuinely delicious and contribute to a truly authentic flavor.
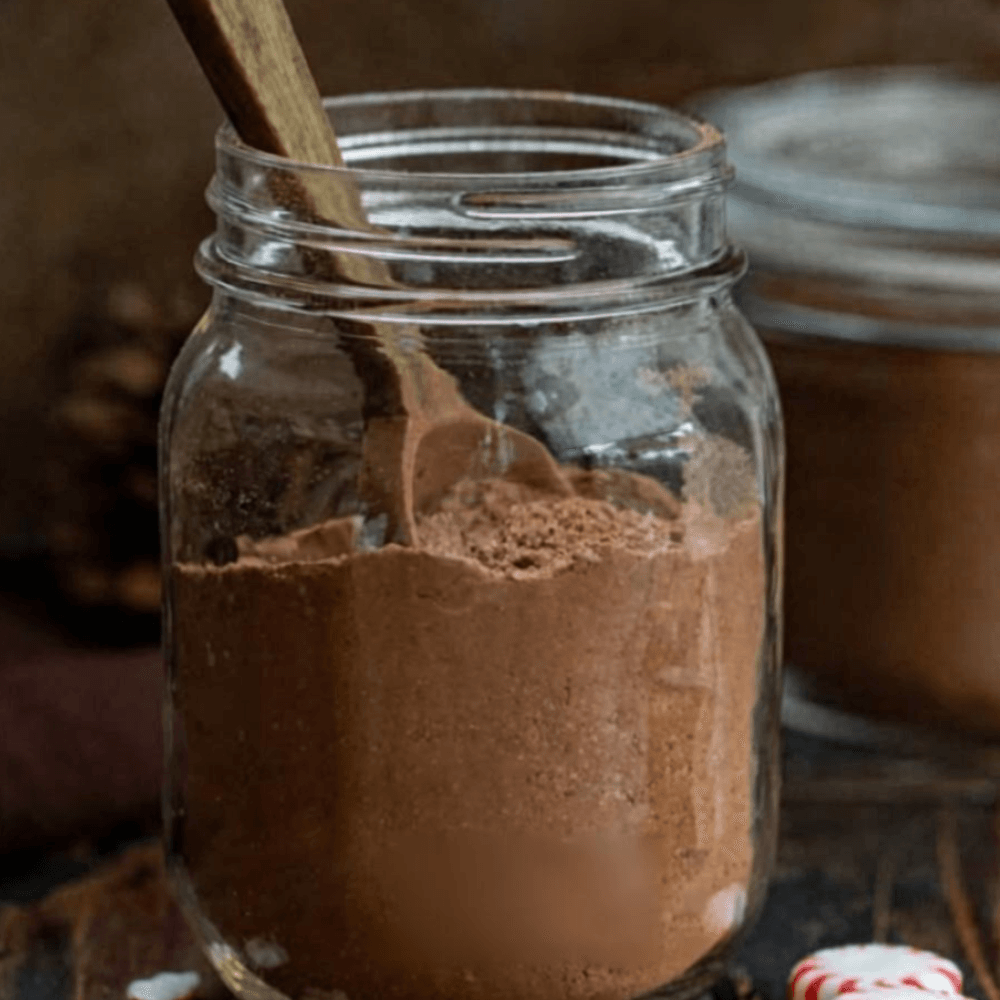
Ingredients for the Creamiest Cocoa
The secret to exceptional Peppermint Cocoa lies in starting with exceptional ingredients. Each component plays a vital role in achieving that perfect balance of richness, sweetness, and minty freshness.
Cocoa Powder: Dutch-processed vs. natural unsweetened: For the deepest, richest chocolate flavor and a beautiful dark hue, Dutch-processed cocoa powder is your best friend. It has been treated with an alkali to neutralize its acidity, resulting in a smoother, less bitter chocolate taste that dissolves beautifully. Natural unsweetened cocoa powder, while great for baking, can sometimes yield a slightly sharper, fruitier chocolate note that might clash with the delicate peppermint.
Milk Selection: Why whole milk or half-and-half works best: This is where the “creamy” in creamy holiday drinks truly comes into play. Whole milk provides the ideal fat content for a luscious, velvety texture. For an even more decadent experience, consider using half-and-half. While lighter milks can work, they won’t deliver the same opulent mouthfeel that makes homemade Peppermint Cocoa so irresistible. Alternatively, for a delightful dairy-free peppermint cocoa, look to rich oat milk or full-fat coconut milk.
Sweeteners: Granulated sugar, brown sugar, or maple syrup options: Granulated sugar offers a clean sweetness that allows the chocolate and mint to shine. However, don’t shy away from experimenting! A touch of brown sugar can add subtle caramel notes and depth, while a drizzle of pure maple syrup introduces a wonderful warmth and complexity. Choose your sweetener based on your desired flavor profile, but remember to adjust the quantity to your personal taste.
The Secret Ingredient: Why a pinch of salt is non-negotiable: This might seem counterintuitive, but a tiny pinch of fine sea salt is the unsung hero of any chocolate recipe. It doesn’t make your cocoa salty; instead, it enhances the chocolate flavor, making it taste richer and more profound. It brightens the overall profile and balances the sweetness, making your Peppermint Cocoa truly sing.
How to Make Peppermint Cocoa from Scratch (Step-by-Step)
Creating this homemade winter drink is a simple pleasure that yields incredible results. Follow these steps for the perfect mug of candy cane cocoa.
Step 1: Creating the Chocolate Paste
In a medium saucepan, whisk together your chosen cocoa powder, sugar, and the crucial pinch of salt. This dry mix is key to preventing clumps. Once combined, add just a splash (about 1/4 cup) of your milk and whisk vigorously until a smooth, thick paste forms. This paste ensures that your cocoa powder fully dissolves and disperses, creating a uniform, lump-free base for your Peppermint Cocoa.
Step 2: Simmering the Milk
Gradually pour in the remaining milk, continuing to whisk as you add it. Place the saucepan over medium heat. Heat the mixture gently, stirring frequently, especially around the bottom of the pan, to prevent scorching. The goal is to bring the mixture to a steaming, *not boiling*, temperature. You’ll see small bubbles forming around the edges and steam rising. Temperature control tips: Avoid high heat, which can scald the milk and lead to a funky taste. Gentle simmering ensures the flavors meld beautifully without compromising the milk’s integrity. Just before it reaches a boil, remove it from the heat.
Step 3: Infusing the Flavor
Once your hot cocoa base is perfectly warm and steaming, it’s time for the star flavor! Remove the saucepan from the heat and stir in the peppermint extract. Adding it off the heat is crucial because high temperatures can cause the delicate peppermint oils to evaporate, diminishing their potency. Start with 1/2 teaspoon and taste; you can always add a tiny bit more if you desire a stronger mint flavor in your Peppermint Cocoa. A good quality pure peppermint extract is essential for that clean, vibrant minty kick.
“The magic of homemade Peppermint Cocoa isn’t just in the ingredients, but in the mindful process. Each whisk and stir infuses love into every sip, transforming simple elements into pure holiday joy.”
Top Tips for Success
Achieving the perfect mug of Peppermint Cocoa is about more than just following the steps; it’s about paying attention to a few key details that elevate it from good to absolutely phenomenal.
Don’t Overheat: Preventing a skin from forming on the milk: When milk gets too hot, especially if left undisturbed, a thin protein film can form on the surface. This “skin” is unappetizing. By keeping the heat moderate and stirring consistently, you can prevent this from happening, ensuring your festive hot chocolate remains smooth and inviting.
Whisk Constantly: Ensuring a smooth, velvety texture: A consistent whisk is your best tool for preventing lumps and encouraging a uniform creamy texture. It helps the cocoa and sugar fully dissolve and keeps the milk from scorching on the bottom of the pan. The result is a truly velvety, luxurious beverage.
Taste and Adjust: Balancing the mint-chocolate ratio: Every palate is different. Some prefer a subtle whisper of mint, while others crave a bold blast. Always taste your Peppermint Cocoa before serving and adjust the sweetness or peppermint extract to your liking. It’s your creation, so make it perfect for you!

Variations to Try
Once you’ve mastered the classic Peppermint Cocoa, the possibilities for customization are endless. Get creative and make this holiday staple truly your own!
Spiked Peppermint Cocoa: Adding peppermint schnapps or Baileys for adults: For a grown-up twist on your Christmas morning beverages, add a shot of peppermint schnapps or a creamy liqueur like Baileys Irish Cream to individual mugs. It’s a wonderfully warming indulgence for chilly evenings.
Peppermint Mocha: Incorporating a shot of espresso: Elevate your Peppermint Cocoa into a sophisticated peppermint mocha latte by stirring in a freshly brewed shot of espresso. The coffee adds a layer of rich, complex flavor that perfectly complements the mint and chocolate.
Dairy-Free & Vegan: Using oat milk or coconut milk: Don’t let dietary restrictions keep you from enjoying this treat! Use a rich, creamy plant-based milk like full-fat oat milk or canned full-fat coconut milk (for a hint of coconut flavor). Ensure your cocoa powder and any chocolate chips (if adding) are dairy-free to create a delicious dairy-free peppermint cocoa.
Double Chocolate: Melting in real chocolate chips: For an extra dose of chocolatey goodness, stir in a handful of good quality dark or semi-sweet chocolate chips along with the cocoa paste. The melting chocolate will add incredible depth and an even richer, more luxurious texture to your Peppermint Cocoa.
Serving Suggestions & Toppings
The presentation of your homemade winter drinks is just as important as the taste. Transform your Peppermint Cocoa into a visually stunning masterpiece with these delightful topping ideas.
Homemade whipped cream: Nothing beats a generous dollop of freshly whipped cream. Lightly sweeten it with a touch of vanilla for the ultimate cloud-like topping.
Crushed candy cane rims: For the quintessential candy cane cocoa experience, moisten the rim of your mug and dip it into finely crushed candy canes. This adds a beautiful festive touch and an extra burst of minty crunch with every sip.
Chocolate shavings and marshmallow floater: A sprinkle of dark chocolate shavings adds elegance and a hint of bitterness to cut through the sweetness. And, of course, no hot cocoa is complete without a fluffy marshmallow (or two!) slowly melting into the warm liquid.
Frequently Asked Questions (FAQ)
Here are some common questions about making and enjoying your perfect Peppermint Cocoa:
Can I make this in a slow cooker for a crowd?
Absolutely! For a large gathering, prepare the chocolate paste as directed, then whisk in the milk. Transfer the mixture to a slow cooker and set it to low for 2-3 hours, stirring occasionally. Add the peppermint extract during the last 30 minutes of heating. This keeps your Peppermint Cocoa warm and ready for serving.
How do I store leftovers?
Allow any leftover Peppermint Cocoa to cool completely before transferring it to an airtight container. Store it in the refrigerator for up to 3-4 days. Reheat gently on the stovetop over low heat, stirring frequently, or in the microwave.
Can I use fresh mint leaves instead of extract?
While fresh mint can be used, it yields a different, often more subtle and herbal flavor than the crisp punch of peppermint extract. To use fresh mint, gently muddle about 1/4 cup of fresh mint leaves and steep them in the warm milk for 10-15 minutes before adding the chocolate paste. Strain the milk before serving. You may still need a tiny drop of extract to achieve a robust mint flavor.
We hope this guide inspires you to create the most delicious and comforting Peppermint Cocoa this holiday season. Don’t forget to follow us for more delicious recipes and holiday cheer on our Facebook page: https://www.facebook.com/profile.php?id=61568538666337

Creamy Homemade Peppermint Cocoa
Ingredients
- 4 cups Whole milk Can substitute oat milk or almond milk for dairy-free.
- 1/4 cup Unsweetened cocoa powder Dutch-processed recommended for a smoother taste.
- 1/3 cup Granulated sugar Adjust to taste.
- 1/8 tsp Salt Enhances the chocolate flavor.
- 1/2 tsp Peppermint extract Start with less; it is potent.
- 1/2 tsp Vanilla extract Optional, adds depth.
- 1 cup Whipped cream For garnish.
- 2 tbsp Crushed peppermint candies For garnish.
Instructions
- In a small bowl, whisk together the sugar, cocoa powder, and salt until no lumps remain.
- Pour the milk into a medium saucepan placed over medium-low heat.
- Whisk the dry cocoa mixture into the milk continuously until fully dissolved and smooth.
- Heat the mixture until it is steaming and hot, but do not let it come to a rolling boil.
- Remove the saucepan from the heat.
- Stir in the peppermint extract and vanilla extract.
- Pour immediately into mugs.
- Top with a generous dollop of whipped cream and sprinkle with crushed peppermint candies before serving.
For more daily recipes and tips, follow us on Facebook!
Click here to join our community!