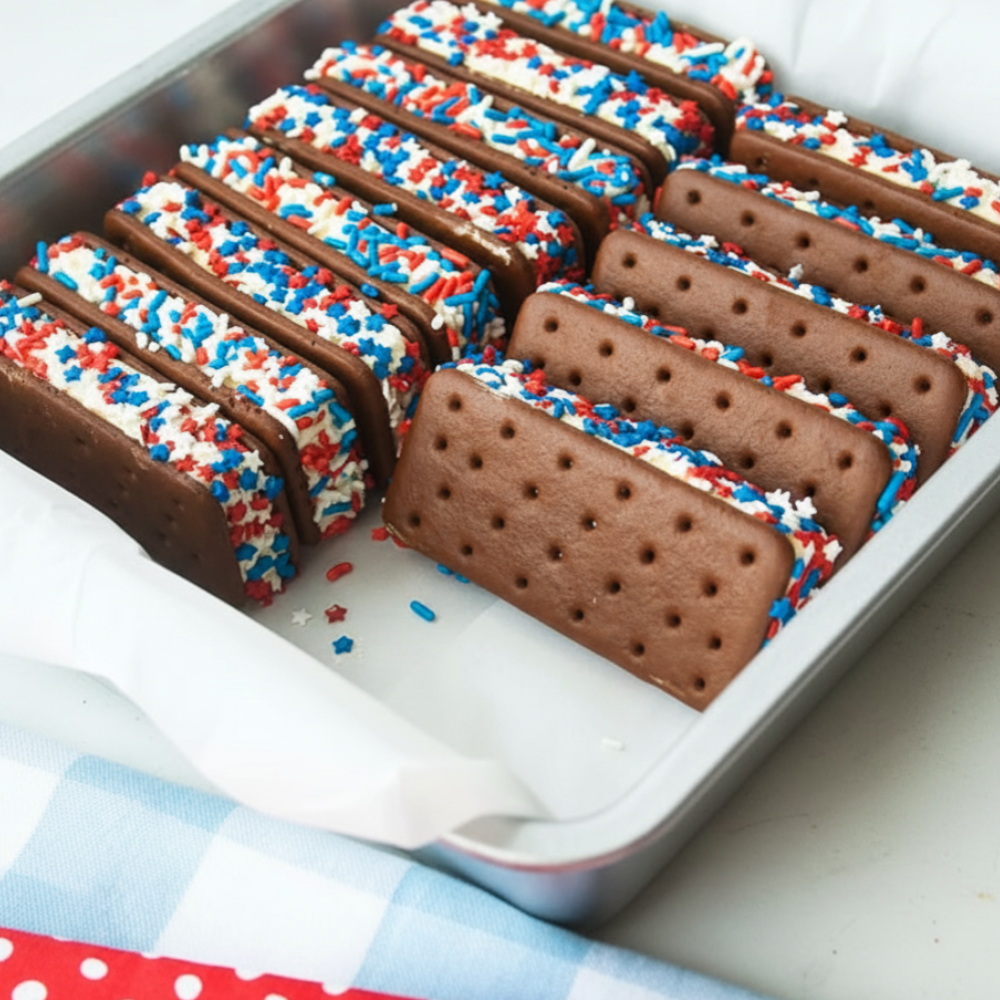
The Ultimate Summer Holiday Treat
As the warmer months arrive, bringing with them cherished holidays like the Fourth of July and Memorial Day, the search for the perfect dessert begins. These occasions call for something special, something that captures the festive spirit and offers a delightful reprieve from the summer heat. Look no further than these charming, easy-to-make Patriotic Ice Cream Sandwiches. These red white and blue treats are more than just a dessert; they are a celebration in miniature form. They offer a classic combination of creamy vanilla ice cream nestled between rich chocolate wafers, all adorned with a vibrant burst of holiday colors. This recipe delivers a refreshing finish to any barbecue or gathering, establishing itself as one of the best summer holiday sweets you can prepare. It is a fantastic no bake holiday dessert that ensures you spend less time in the kitchen and more time enjoying the festivities.
Why Make DIY Mini Treats?
The appeal of homemade desserts lies in their unparalleled freshness and the personal touch they bring to any occasion. While store-bought options can be convenient, crafting your own allows for complete control over ingredients and presentation. These mini ice cream treats are especially wonderful because their small size makes them perfect for parties. Guests can enjoy a sweet bite without feeling overwhelmed, leaving room for other festive party snacks. Creating these DIY chocolate wafer sandwiches also means you can cater to specific preferences and ensure the highest quality components. Furthermore, involving children in the assembly process makes these excellent kid friendly dessert ideas, creating fun memories along with delicious results. It is a straightforward process, making it one of those genuinely easy summer recipes that delivers impressive results with minimal effort.
Required Ingredients
To create these delightful Patriotic Ice Cream Sandwiches, precision in your ingredient selection and measurements will ensure the best outcome. Gather these items exactly as specified for perfectly balanced flavors and textures.
- 24 Chocolate Wafers: These form the foundation of your sandwiches. You can use either store-bought wafers for convenience or homemade ones for an extra touch of artisanal quality. Their crisp texture and rich cocoa flavor are essential for the overall experience.
- 1.5 Cups Vanilla Ice Cream: This is the heart of your treat. For optimal handling, allow the ice cream to sit on the counter for a brief period. It should become slightly softened, making it much easier to scoop and spread evenly across the wafers without tearing them or making a mess.
- 1/2 Cup Festive Sprinkles: These sprinkles are not just for decoration; they provide the iconic red white and blue treats appearance. Ensure you choose sprinkles specifically in these patriotic colors to achieve the signature holiday look.
Step-by-Step Instructions
Follow these clear, concise steps to assemble your Patriotic Ice Cream Sandwiches effortlessly. Each stage is designed for simplicity, ensuring a smooth and enjoyable preparation process.
1. Prepping Your Station
Begin by preparing your workspace. Line a small baking sheet or a sturdy tray with parchment paper. This vital step prevents the ice cream sandwiches from sticking to the surface, making them easy to lift once frozen. The parchment paper also facilitates a seamless transfer of the finished treats to the freezer. Carefully place 12 of your chocolate wafers flat on the prepared tray, arranging them in a single layer to make the next steps more efficient.

2. Assembling the Sandwiches
With your base wafers ready, it is time to add the creamy filling. Take your slightly softened vanilla ice cream. Using a small scoop or spoon, place approximately 2 tablespoons of ice cream onto the center of each of the 12 bottom wafers. This amount, totaling about 1.5 cups for all 12 sandwiches, ensures a generous but manageable filling. Once the ice cream is in place, gently top each with one of the remaining 12 chocolate wafers. Press down very lightly on the top wafer. The goal is for the ice cream to reach the edges evenly without oozing out excessively. A gentle press helps create a neat, uniform sandwich structure.
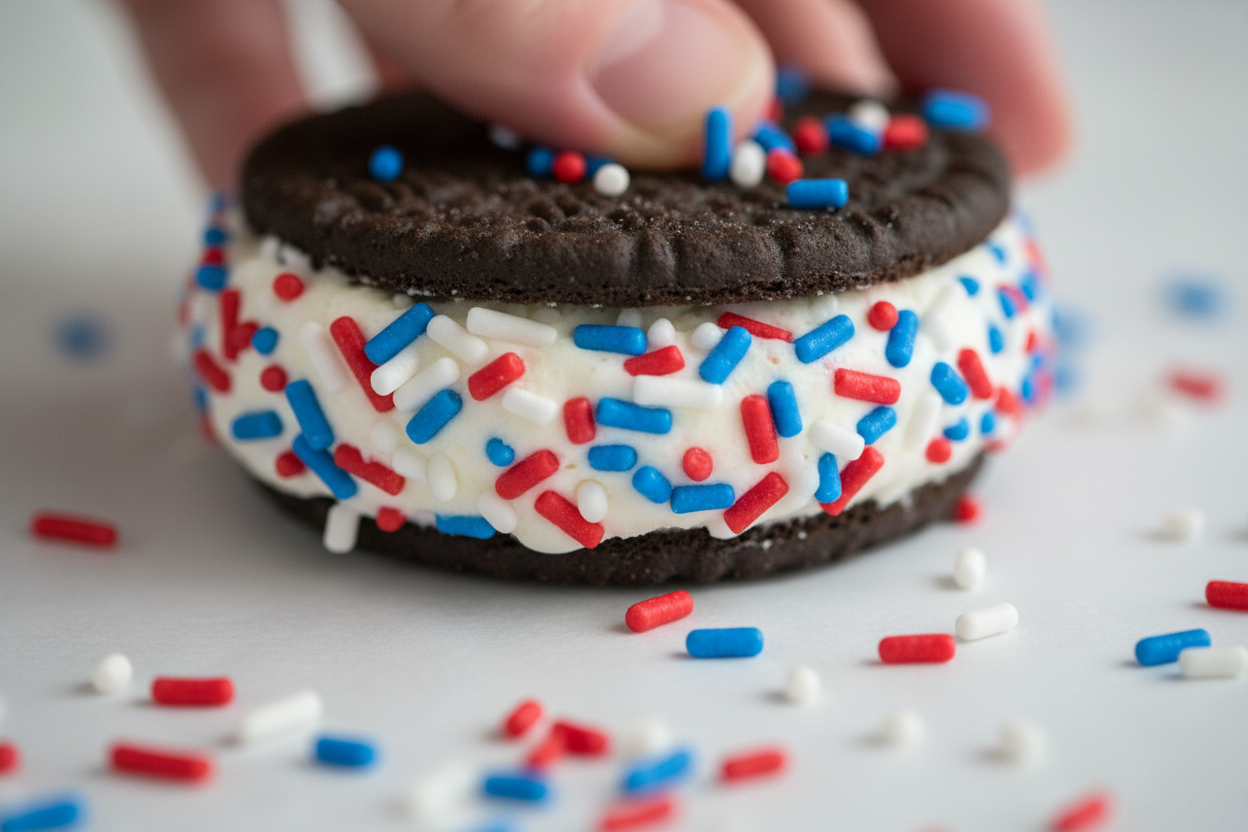
3. Adding the Finishing Touches
Now, for the dazzling, patriotic exterior. Pour your 1/2 cup of red, white, and blue sprinkles into a shallow bowl. This setup makes the rolling process clean and efficient. Take each assembled ice cream sandwich and carefully roll its exposed ice cream edge through the sprinkles. Continue rolling until the entire perimeter of the ice cream filling is thoroughly coated. The sprinkles will adhere to the soft ice cream, creating a vibrant, appealing border that instantly evokes the spirit of a celebration and transforms them into perfect festive party snacks.
4. Freezing for Best Results
Once all your sandwiches are assembled and adorned with sprinkles, carefully place them back onto the parchment-lined tray. Arrange them so they do not touch each other, allowing for even freezing. Transfer the tray to the freezer and let them firm up for at least 1 hour before you plan to serve them. This crucial freezing time ensures that the ice cream is solid, holds its shape perfectly, and creates a clean, satisfying bite. Proper freezing also prevents the sandwiches from becoming messy when handled, making them ideal for any gathering.
Pro Tips for Perfectly Rolled Edges
Achieving that clean, festive sprinkle edge is simpler with a few expert techniques. These tips ensure your Patriotic Ice Cream Sandwiches look as good as they taste.
- Work in Batches: If your kitchen is particularly warm, the ice cream can melt quickly. To counteract this, consider assembling only a few sandwiches at a time. Keep the rest of your vanilla ice cream and un-assembled wafers in the freezer or refrigerator. This strategy prevents premature melting and ensures your ingredients remain firm and easy to handle.
- Use a Cookie Scoop: For consistent and attractive results, a small cookie scoop with a trigger release is an invaluable tool. It guarantees uniform portions of ice cream for every sandwich. This not only makes the assembly process faster but also ensures that each mini treat has the same perfect ice cream-to-wafer ratio.
- Smooth the Edges: Before you roll your sandwiches in the festive sprinkles, you can refine their appearance further. Use a small offset spatula or the back of a spoon to gently smooth the ice cream around the rim. This creates a neat, even surface for the sprinkles to adhere to, resulting in a more polished and professional-looking finish.
Flavor Variations to Try
While the classic vanilla and chocolate combination is undeniably delicious, these Patriotic Ice Cream Sandwiches offer versatility for those who wish to experiment. These variations stick to simple substitutions, allowing you to customize without complicating the process.
- Strawberry Ice Cream: For an additional burst of color and flavor, swap the vanilla ice cream for strawberry ice cream. This introduces a lovely pink or red hue, enhancing the patriotic theme even further. The fruity notes complement the chocolate wafers beautifully.
- Graham Crackers: If you are looking for a different textural experience, consider substituting the chocolate wafers with graham crackers. This provides a delightful s’mores-inspired twist to your ice cream sandwiches, offering a slightly different crunch and flavor profile.
- Chocolate Chips: For those who love extra texture and a hint of rich cocoa, mix mini chocolate chips directly into your red, white, and blue sprinkles. When you roll the edges, these tiny chips will adhere alongside the sprinkles, providing a pleasant textural contrast and an extra layer of chocolatey goodness.
Storage and Make-Ahead Advice
The convenience of these no bake holiday dessert treats is one of their most appealing features. They are perfectly suited for making ahead, significantly reducing stress on the day of your event.
These Patriotic Ice Cream Sandwiches can be prepared several days in advance without any loss of quality. Once fully frozen and firm, store them in an airtight container in the freezer. They will maintain their deliciousness and texture for up to a week. To ensure maximum freshness and to prevent freezer burn, an extra step can be taken. After the sandwiches are completely frozen, wrap each one individually in plastic wrap before placing them in the airtight container. This additional layer of protection helps preserve their creamy texture and prevents ice crystals from forming.
Frequently Asked Questions
Here are answers to some common questions about making these delightful Patriotic Ice Cream Sandwiches.
- Can I use a different type of cookie? Yes, you absolutely can. While chocolate wafers are traditional for this recipe, you are welcome to experiment with other cookies. Soft baked chocolate chip cookies or snickerdoodles work exceptionally well as substitutes. Ensure the cookies are relatively flat and sturdy enough to hold the ice cream filling.
- How long do they take to thaw? These ice cream sandwiches are best enjoyed when slightly softened but still firm. They only require about 2 to 3 minutes at room temperature before eating to achieve the ideal texture. This brief thaw allows the ice cream to become creamy while the wafers remain crisp, offering a perfect bite.
These Patriotic Ice Cream Sandwiches are truly an ideal choice for any summer celebration, whether it is the Fourth of July, Memorial Day, or just a sunny gathering. Their vibrant appearance, refreshing taste, and easy preparation make them a guaranteed crowd-pleaser and a standout among easy summer recipes. They embody the festive spirit and offer a delightful way to cool down.
For more inspiring kid friendly dessert ideas, festive recipes, and behind-the-scenes glimpses of our culinary adventures, make sure to follow our Facebook page. You will find a community of food lovers and plenty of new ideas to spice up your kitchen. Follow us on Facebook today.

Red, White, and Blue Mini Ice Cream Sandwiches
Ingredients
- 24 pieces Chocolate wafers Store-bought or homemade
- 1.5 cups Vanilla ice cream Slightly softened
- 0.5 cup Red, white, and blue sprinkles For coating edges
Instructions
- Line a small baking sheet or tray with parchment paper.
- Place 12 chocolate wafers flat on the prepared tray.
- Scoop approximately 2 tablespoons of slightly softened vanilla ice cream onto the center of each wafer.
- Top with the remaining 12 wafers, pressing down gently so the ice cream reaches the edges.
- Pour the red, white, and blue sprinkles into a shallow bowl.
- Roll the exposed ice cream edges of each sandwich in the sprinkles until fully coated.
- Place the assembled sandwiches back on the tray and freeze for at least 1 hour before serving.
For more daily recipes and tips, follow us on Facebook!
Click here to join our community!