
Unwrap Warmth: The Ultimate Homemade Hot Cocoa Mix Recipe
There’s something inherently magical about a steaming mug of hot cocoa. It’s a taste that transports us back to chilly winter evenings, crackling fireplaces, and shared moments of comfort. While store-bought packets offer convenience, nothing truly compares to the rich, customizable delight of a homemade hot cocoa mix. Imagine a blend where you control every nuance – the sweetness, the depth of chocolate, and the pure quality of ingredients. This isn’t just a recipe; it’s an invitation to elevate your cozy beverage experience and create a truly gourmet treat that’s far superior to anything from a box.
Why This is the Best Homemade Hot Cocoa Mix
What makes a truly exceptional cup of hot chocolate? It’s more than just cocoa and sugar. Our carefully crafted homemade hot cocoa mix recipe incorporates a few culinary secrets that ensure every sip is smooth, rich, and utterly divine.
Creaminess Factor: The Role of Dry Milk Powder
The secret to achieving that luxurious, velvety texture usually reserved for café-style hot chocolates lies in dry milk powder. While you’ll still be adding liquid milk when preparing your drink, incorporating powdered milk directly into the mix provides an unparalleled depth of creaminess. It emulsifies beautifully, creating a thicker, more satisfying mouthfeel that’s incredibly comforting. This also means you can prepare a delicious cup with just hot water, if milk isn’t readily available, without sacrificing too much richness. It’s an ideal component for versatile powdered milk recipes that demand that extra silky touch.
Texture Secret: Why We Add a Pinch of Cornstarch
Ever wonder why some hot cocoas have a thin, watery consistency? Our mix prevents that by adding a tiny pinch of cornstarch. This simple ingredient acts as a subtle thickener, giving your hot chocolate a smooth, luscious body without making it gluey. It helps suspend the chocolate particles, preventing them from settling at the bottom and ensuring every sip is consistently delightful. This small addition makes a monumental difference in the overall drinking experience, contributing to that desired “creamy hot chocolate recipe” feel.
Flavor Depth: The Importance of Salt in Chocolate Desserts
It might seem counterintuitive to add salt to something sweet, but a small amount of fine sea salt is crucial for unlocking the full potential of chocolate. Just like in any dessert, salt enhances and amplifies the chocolate flavor, making it taste richer and more complex. It balances the sweetness, preventing the mix from being cloyingly sweet and instead creating a well-rounded, sophisticated profile. Don’t skip this ingredient; it’s a game-changer for truly gourmet cocoa powder recipes.
Ingredients You Need
Creating the perfect bulk hot chocolate mix starts with selecting the right ingredients. Here’s what you’ll need to craft your exquisite blend:
- Cocoa Powder: Natural vs. Dutch-processed – Which to Choose?
This is where the magic begins! You have two main types of cocoa powder: natural cocoa and Dutch-processed cocoa. Natural cocoa (like Hershey’s unsweetened) is acidic and has a sharp, fruity chocolate flavor. Dutch-processed cocoa, on the other hand, has been treated with an alkali to reduce its acidity, resulting in a darker color, mellower flavor, and smoother texture. For our homemade hot cocoa mix, we highly recommend Dutch-processed cocoa. Its less acidic nature yields a smoother, richer, and more profoundly chocolatey drink that tastes wonderfully indulgent. It’s the secret to that deep, dark chocolate flavor you crave, making it the ideal choice for a luxurious, creamy hot chocolate recipe.
- Sugar: Granulated vs. Confectioners’ Sugar
While granulated sugar is standard, we prefer to use a blend or primarily confectioners’ (powdered) sugar in our mix. Confectioners’ sugar is finer and contains a small amount of cornstarch, which helps prevent clumping and ensures a silky-smooth dissolve in hot liquid. If you only have granulated sugar, it will work, but you might notice a slightly grittier texture initially. For the smoothest experience, a finer sugar is always best.
- Dry Milk Powder: Non-fat vs. Whole Milk Powder
As discussed, dry milk powder is essential for creaminess. You can use either non-fat or whole milk powder. Whole milk powder will yield an even richer, more decadent hot chocolate due to its higher fat content, while non-fat milk powder will still provide excellent creaminess with a slightly lighter profile. Both work wonderfully, so choose based on your preference for richness in your homemade hot cocoa mix.
- Add-ins: Mini Marshmallows, Chocolate Chips, or Crushed Candy Canes
While these aren’t mixed into the bulk powder, they are essential companions! Consider packaging small sachets of mini marshmallows, tiny chocolate chips, or crushed peppermint candy canes alongside your mix, especially if you’re making holiday food gifts. These delightful additions provide textural contrast and extra bursts of flavor.
Step-by-Step Instructions
Crafting your DIY hot chocolate mix is incredibly simple. Just follow these steps for a perfectly blended product:
- Sifting: Removing Lumps for a Smooth Drink
This is a crucial first step for a truly smooth hot cocoa. Place a fine-mesh sieve over a large mixing bowl. Add all your powdered ingredients (cocoa powder, sugar, dry milk powder, cornstarch, and salt) into the sieve. Sift them together, gently tapping the sides of the sieve to push everything through. This breaks up any clumps in the cocoa or sugar and ensures an incredibly smooth, lump-free beverage when prepared.
- Mixing: Ensuring Even Distribution
Once everything is sifted into the bowl, use a whisk to thoroughly combine all the ingredients. Whisk for at least 2-3 minutes, making sure there are no streaks of unmixed cocoa or sugar. The goal is a uniform, homogenous powder where every scoop delivers the perfect balance of flavor. This ensures a consistent and delicious cup every time, crucial for any bulk hot chocolate mix.
- Storage: Best Containers for Freshness
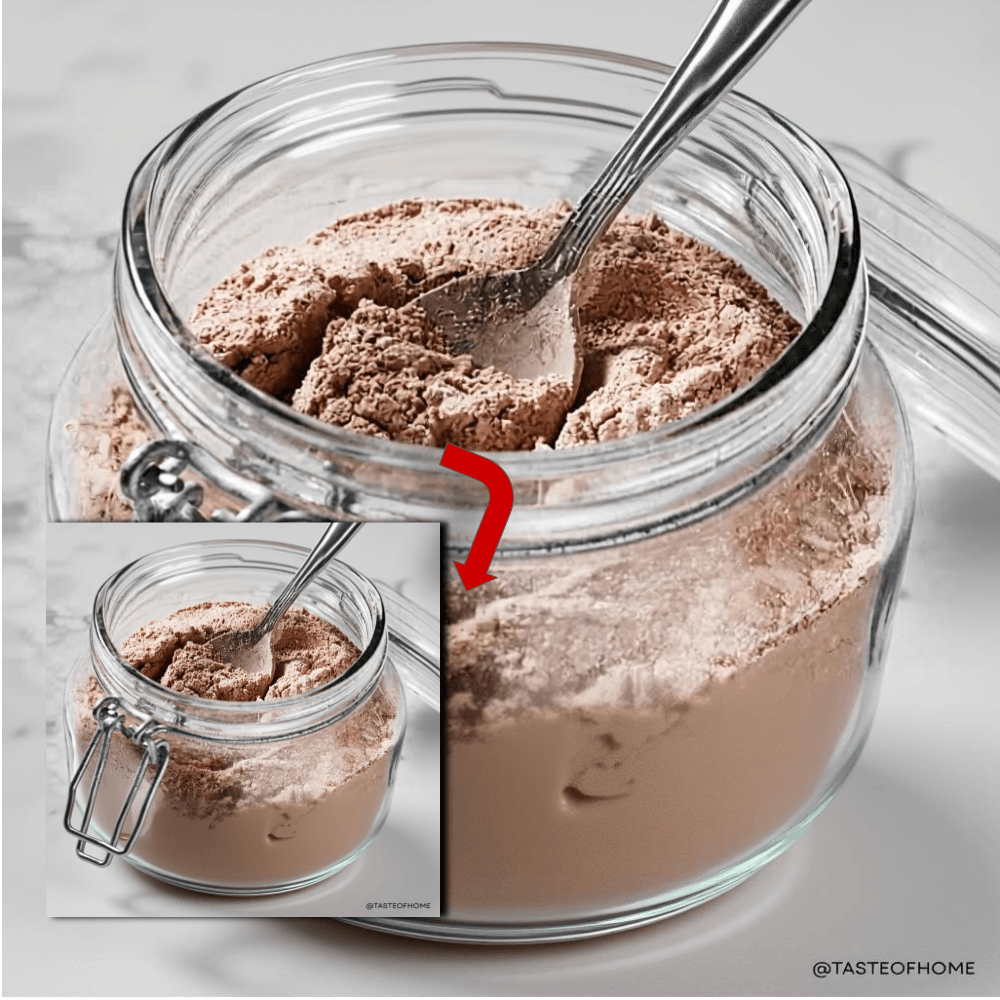
Transfer your freshly made homemade hot cocoa mix to an airtight container. Mason jars, food-grade plastic containers with tight-fitting lids, or vacuum-sealed bags work perfectly. Store it in a cool, dark pantry away from direct sunlight and moisture. Proper storage is key to maintaining freshness and preventing clumping.

Flavor Variations
The beauty of a DIY hot chocolate mix is its versatility. Once you have your basic blend, you can easily customize it with exciting flavor variations:
- Mexican Hot Chocolate: For a delightful kick, add 1 teaspoon of ground cinnamon and a tiny pinch (about 1/8 teaspoon) of cayenne pepper per cup of mix. The warmth of the cinnamon combined with a subtle heat of cayenne creates an invigorating and complex flavor profile.
- Mocha: Elevate your hot cocoa with coffee notes. Stir in 1-2 teaspoons of instant espresso powder (or very finely ground instant coffee) per cup of mix. This creates a sophisticated mocha flavor that’s perfect for coffee lovers.
- Peppermint: A holiday favorite! Add 1/2 teaspoon of pure peppermint extract per cup of prepared hot cocoa, or mix 1/4 cup of finely crushed peppermint candies (like candy canes) into your bulk mix for a festive crunch and cooling sensation.
- Double Chocolate: For the ultimate chocolate indulgence, stir in 1/4 cup of finely shaved dark chocolate or mini chocolate chips per cup of mix. When mixed with hot liquid, these will melt, creating an even richer, more intense chocolate experience.
How to Serve
Now that you have your incredible homemade hot cocoa mix, let’s talk about preparing the perfect cup.
Water vs. Milk: Which Liquid Yields the Best Cup?
This is a matter of personal preference, but for the creamiest, most decadent experience, we highly recommend using milk. The dry milk powder in the mix adds a great foundation, but whole milk or even a plant-based milk (like oat or almond) will result in a significantly richer, more luxurious drink. If you prefer a lighter hot cocoa or are in a pinch, hot water will still yield a delicious and comforting beverage, thanks to the dry milk powder already present. Experiment to find your perfect balance! Aim for 2-3 tablespoons of mix per 8 ounces of hot liquid, adjusting to your taste for a truly delicious, creamy hot chocolate recipe.
Topping Ideas: Whipped Cream, Caramel Drizzle, Marshmallow Fluff
No cup of hot cocoa is complete without decadent toppings! Get creative with:
- Freshly whipped cream: A classic for a reason!
- Caramel drizzle: Adds a sweet, buttery counterpoint to the chocolate.
- Marshmallow fluff or toasted mini marshmallows: For gooey, melting goodness.
- Chocolate shavings or sprinkles: A visual and textural treat.
- A sprinkle of cinnamon or a dash of nutmeg: Enhances the spice notes.
DIY Gifting Guide
Your homemade hot cocoa mix makes for truly thoughtful and cherished holiday food gifts. It’s a personalized present that brings warmth and comfort.
Layering the Ingredients in Mason Jars
Transform your mix into stunning “hot cocoa in a jar” gifts. For an extra visual appeal, you can layer the ingredients, though for best mixing, it’s often better to pre-mix the powder. If you choose to layer, consider alternating between the darker cocoa powder and the lighter sugar/milk powder blend. If you’ve already pre-mixed the powder, simply spoon the entire blend into clean, dry Mason jars. Fill them almost to the top, leaving a little space for any additional toppings you might include.
Decorating with Ribbon and Printable Tags
Presentation is key! Tie a festive ribbon around the neck of each jar. Create charming, printable gift tags that include preparation instructions (e.g., “Add 2-3 tablespoons to 8 oz hot milk, stir, and enjoy!”). You can also print tags with the ingredients list and any allergen warnings. Consider adding a small bag of mini marshmallows, a candy cane, or a piece of wrapped chocolate on the side for an extra special touch, making your hot cocoa in a jar truly special.
Shelf Life Advice for Gifting
When sealed properly in an airtight container, your homemade hot cocoa mix can last for up to 6-8 months in a cool, dark pantry. Ensure your recipients know to store it similarly. This makes it an ideal gift that can be enjoyed throughout the colder months.
Frequently Asked Questions (FAQ)
How long does homemade hot cocoa mix last?
When stored in an airtight container in a cool, dark pantry, homemade hot cocoa mix typically lasts for 6 to 8 months. The shelf life is largely determined by the freshness of your dry milk powder and cocoa powder. For optimal flavor and freshness, it’s best to consume it within this timeframe.
Can I make this dairy-free?
Yes, you can absolutely make a dairy-free version of this homemade hot cocoa mix! Simply substitute the dry milk powder with a high-quality dairy-free powdered creamer or a powdered coconut milk alternative. Ensure all other ingredients (cocoa, sugar, cornstarch, salt) are also certified dairy-free if strict dietary needs apply. When serving, use your favorite dairy-free milk alternative like oat, almond, or soy milk.
Why is my hot cocoa grainy?
A grainy hot cocoa can typically be attributed to a few factors: insufficient sifting of ingredients (leading to lumps), sugar that hasn’t fully dissolved (especially if using coarser granulated sugar), or not whisking thoroughly enough when preparing the drink. To prevent graininess, ensure you meticulously sift all powdered ingredients, use finer confectioners’ sugar if possible, and whisk your prepared hot cocoa vigorously until smooth and completely dissolved.
Conclusion
There you have it – the ultimate guide to creating a truly exceptional homemade hot cocoa mix. This recipe transcends the ordinary, offering a customizable, rich, and utterly comforting experience that brings warmth to every sip. Whether you’re making it for yourself, for a family gathering, or as thoughtful DIY hot chocolate mix gifts, you’re now equipped with all the secrets to crafting perfection. So, gather your ingredients, whisk up a batch, and settle in for a moment of pure bliss. Don’t forget to share your delicious creations and follow us for more delightful recipes and foodie inspiration! Find us on Facebook at https://www.facebook.com/profile.php?id=61568538666337 – give our page a follow and join our growing community of food lovers!
Creamy Homemade Hot Cocoa Mix
Ingredients
- Granulated sugar Or powdered sugar for faster dissolving in hot liquid / 2 cups (400g) granulated sugar or 3 3/4 cups (450g) powdered sugar. You are looking for a fine...
- 2 cups Non-fat dry milk powder Adds creaminess
- 1 cup Unsweetened cocoa powder Dutch-processed preferred for smoother flavor
- 2 tsp Cornstarch Optional, helps thicken the drink
- 1 tsp Fine sea salt Enhances chocolate flavor
- 1/2 cup Mini semi-sweet chocolate chips Optional, for extra richness
Instructions
- Set a fine-mesh sieve over a large mixing bowl.
- Sift the sugar, dry milk powder, cocoa powder, cornstarch, and salt into the bowl to remove any lumps.
- Whisk the ingredients gently but thoroughly until the mixture is uniform in color.
- If using, stir in the mini chocolate chips or mini marshmallows.
- Transfer the mix into an airtight container or distribute into Mason jars for gifting.
- To serve: Stir 1/3 cup of the mix into 1 cup of hot water or hot milk. Mix well until dissolved and creamy.
For more daily recipes and tips, follow us on Facebook!
Click here to join our community!